Are you wondering how to post on Instagram from a computer for free? It’s easy to upload photos on mobile, but this isn’t really the case on PC. Obviously, this is a big drawback for a lot of people. After all, who wouldn’t like to be able to upload high-quality photos from their computer straight to Instagram?
In this article, I’ll tell you how to post on Instagram from a computer using free methods!
Contents
How To Post On Instagram From Computer For Free
Via Instagram Web On Desktop
Many people don’t know this, but it’s completely possible to post on Instagram without having to go to the Instagram app.
In fact, the easiest way to do this is to use the official Instagram desktop website to create a new post. Previously, this wasn’t possible, but since 2021, Instagram has made it easier for users to post directly from the desktop version of the site.
This is ideal for people who take high-quality pictures using a professional camera. Instead of having to transfer the photos to their phone just to upload them to Instagram, they can now upload straight from the Instagram website on their computers or laptops.
Just follow the steps below.
- Go to Instagram.com on your desktop browser and log in with your Instagram username or email address and password.
- On the left sidebar, find a rounded square with a cross followed by the text “Create”. Click on it.

- A new window will pop up. Click “Select from Computer” to select the images you want to upload.

- After selecting the image, you’ll be given a chance to crop it to your liking. Click “Next” when you’re done.

- You might also want to add filters to the image. Select from the available choices on the right side and click “Next.”

- Lastly, you can add a caption, tags, and location. Take note that the caption has a maximum limit of 2,200 characters, 30 hashtags, and 30 mentions.
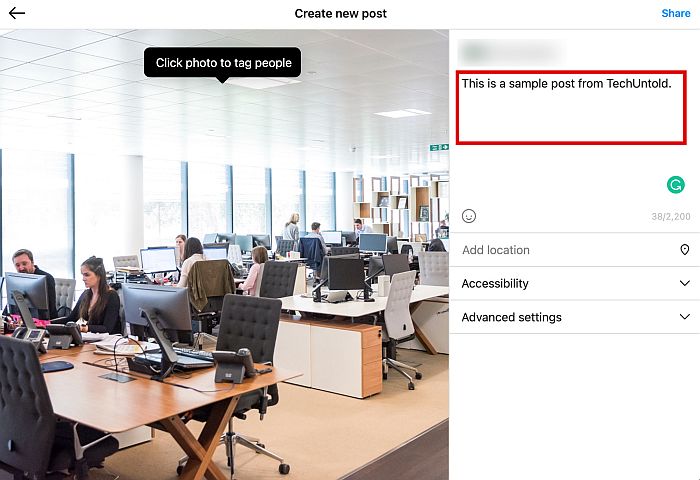
- Once you’re done, click “Share.” And that’s it, you’ve now successfully posted to Instagram from your desktop.


Via Facebook Creator Studio
One of Facebook’s best features is called the Creator Studio, which allows users who have a Facebook page to manage everything that has to do with their page in one place.
The Facebook Creator Studio can show insights, messages, and other important aspects of your page. More importantly, it can help you post straight to Instagram from your desktop.
The process works the same whether you’re posting to your Instagram page or your Facebook page.
- Go to the Creator Studio.
- Click Create Post.

- If you have more than one page or account, select which one you want to upload the post to.

- Tap “Add Photo” to upload the image that you want to post to Instagram.

- You can also add other details like the caption or the location. Again, keep in mind that there’s a character limit for the caption, as mentioned above.

- You can even change the resolution or crop the image if you want, just by clicking the Edit button.

- You’ll find different resolution options here. The best option for an Instagram feed is either 1:1 (Square) or 4:5 (Vertical.)

- This is also where you can add filters or alt text if you want to.

- After choosing the resolution and adding filters, you can click “Apply” to see how it looks first. If you’re satisfied, click “Save” to save your changes.

- Once that’s done, click “Publish” to publish your post on Instagram.

- If you want to schedule Instagram posts, you can also click the arrow button to the right. It should bring up a small menu. Click “Schedule Post.”

- You’ll be asked to select the date and time you want to post to go live. After selecting one, simply click “Save” and you’re done.
You can also watch this video to see how Facebook Creator Studio works for Instagram accounts.

If you want to be able to schedule Instagram posts, you can also use third-party tools. Check out the best choices in this article.
Using a Google Chrome Extension (Video)
When you open Instagram in your browser, you can see that it has everything available in the Instagram app, save for a few features. You can like and comment on photos, view full-size photos, view stories, or even go live. Just recently, Instagram has also started allowing people to use Instagram Direct from the browser.
And luckily, now Instagram allows users to post images via the browser. However, we know that in the past, this feature was not always available. At some point, Instagram simply disabled it.
In case Instagram does it again, there is a way to get around this.
If you’re a Chrome user, you can download a free browser plugin Desktop for Instagram from the Chrome Store.
Watch this video to see how to use it:

Bluestacks

What Is Bluestacks
Bluestacks is a free computer software that allows you to run native Android apps from your desktop computer. It’s a lot like having a virtual mobile device on your desktop itself, especially since it comes with Play Store already preinstalled.
With Bluestacks, you can run your favorite Android apps directly from your Mac or PC, including Instagram. You can do almost everything you can do on the Instagram mobile app using Bluestacks, such as commenting on photos, viewing and posting stories, sending Instagram Direct messages, and of course, uploading photos. Currently, the only thing you really can’t do is upload IGTV videos.
It does come with a few downsides, though. First, the latest Bluestacks version can only run Android KitKat (4.4.2). Since there are some apps that are no longer compatible with older Android versions, it does limit the apps that you can download on your computer.
If you need something more advanced, you’re going to have to follow an entirely different process by downloading the Android SDK instead. Or take a look at these Bluestack alternatives.
That said, if you’re only using Bluestacks for Instagram, this shouldn’t be a problem. That’s because, as of this writing, Instagram is still compatible with Android KitKat.
This brings us to the next downside, which is the system requirements of Bluestacks. If you’re a casual user who’s only planning to use Bluestacks for Instagram, it’s probably not the best idea.
In order to run Bluestacks, you should have at least 2GB of RAM, 5GB of HDD space, and any modern Intel or AMD processor. And that’s only the minimum.
The recommended build in order to run Bluestacks is 8GB of RAM, 5GB of SSD space, a multi-core Intel or AMD processor with a PassMark score of at least 1000, and a dedicated graphics card with a PassMark score of at least 750. In short, it’s a very demanding app that may not be suitable for casual Instagram users.

The good thing is, these issues shouldn’t hinder you too much from using Instagram from your desktop, unless of course, if your computer can’t support the minimum requirements. But if you’re looking for the best alternative to using Instagram on desktop, Bluestacks is still up there on the list.
How To Install Instagram On Bluestacks
Ready to install and use Bluestacks? Without further ado, here are the steps for posting photos on Instagram from your laptop or PC using Bluestacks.
1. Before you can use Bluestacks, you first have to sign in to your Google Account.
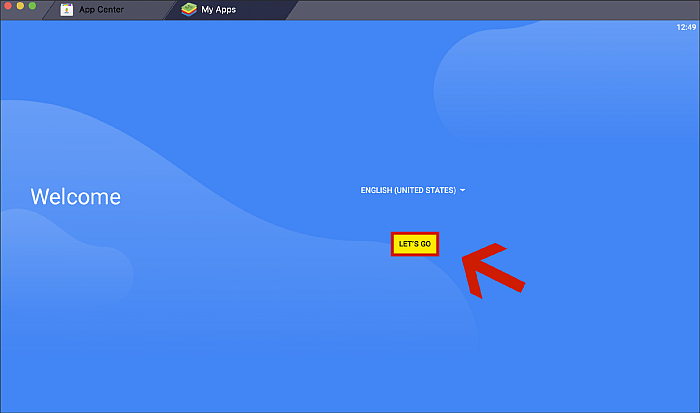

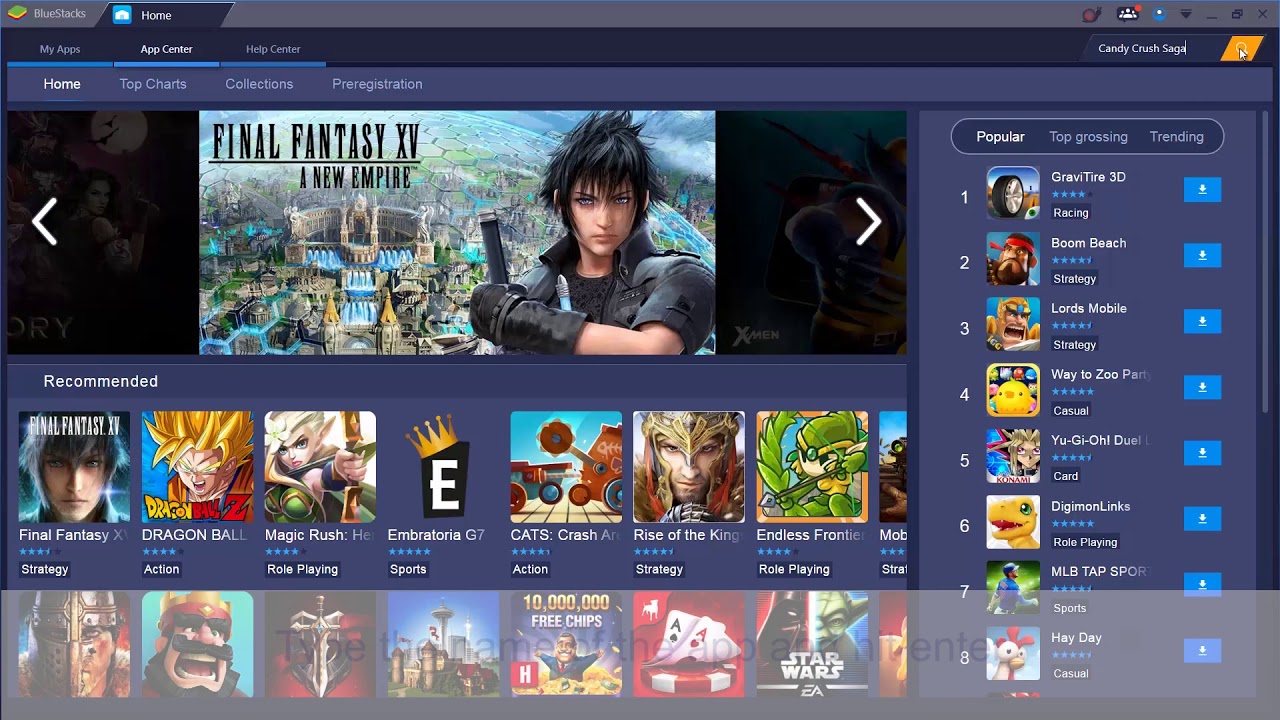
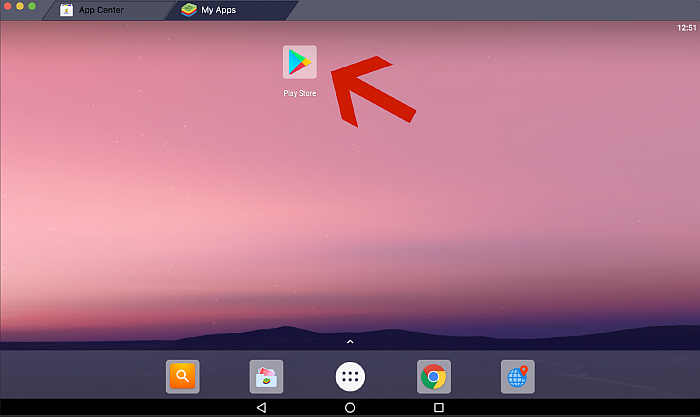
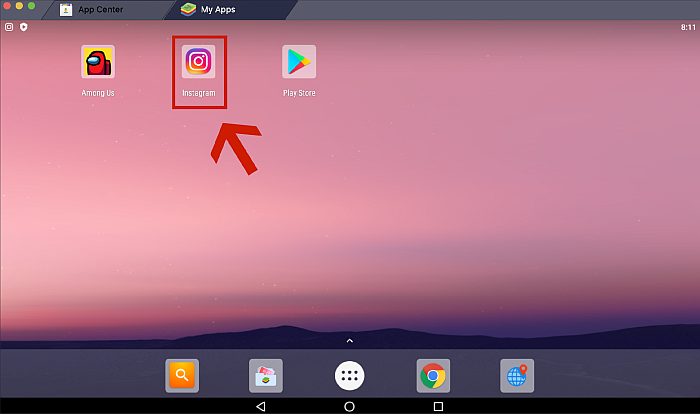
2. Welcome to your new virtual mobile. As you can see, it looks exactly the same as the home screen on your phone. It comes preinstalled with the Google Play Store, too. Click the Play Store icon to begin.
3. Google Play Store will load in another tab. Go to the search bar and type Instagram. Download and install the app.

4. Once it’s done, click “Open” to launch the app.

5. A new tab will pop up showing Instagram. Log in using your Instagram details.

6. That’s it. You can now use Instagram from your PC or laptop the same way that you would use the mobile app.

How To Use Instagram On Bluestacks
Now that you’ve set up Instagram on Bluestacks, it’s time to start using it. Here’s how to post photos using Bluestacks:
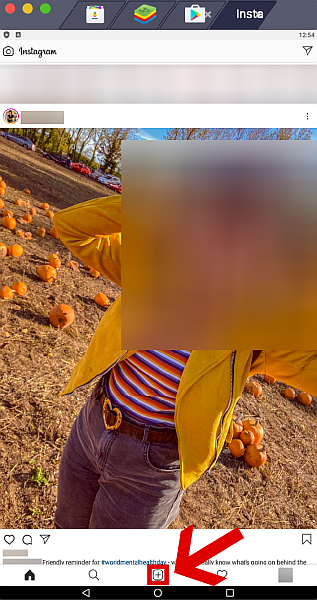
1. Launch the Instagram app from your Bluestacks home screen.
2. Click on the camera (+) button at the bottom.
3. You’ll see the normal options like in the mobile Instagram app. To the left, you’ll see the Gallery tab.

4. At the upper left of the Gallery tab, you can see a dropdown menu. Click Other and you’ll be brought to the Media Manager tab.

5. On the Media Manager tab, click Pick from Windows to select the images you want from your computer.

6. Sometimes, it will say “Unable to load image.” Don’t worry, just switch to another tab and return to Media Manager. You should now see your images.
7. You can also just go back to the Instagram tab. You’ll see your photo already there and ready for uploading.

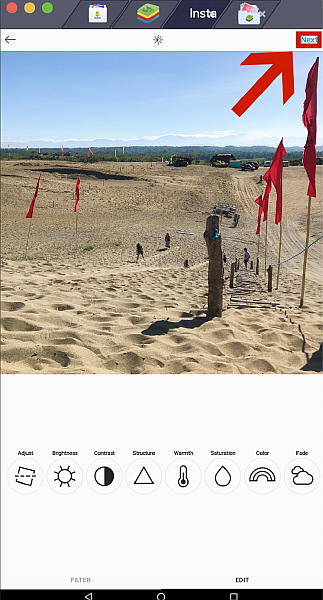
8. Click Next to go to the next screen. On the next few screens, you’ll be able to add filters, edit the photo, add captions, edit the location, tag people, and so on.

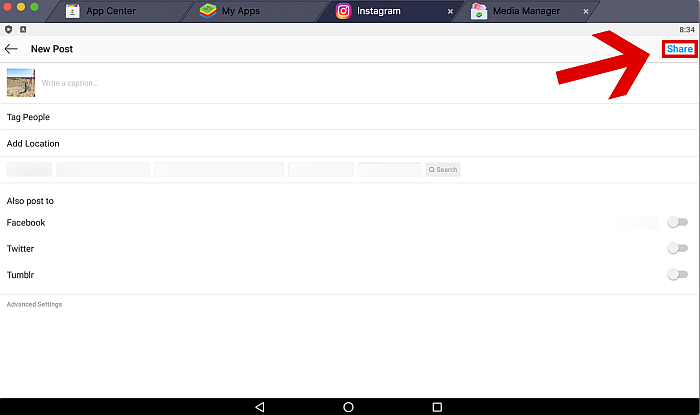
9. To post your photos, just click Share at the upper right of the screen. And there you have it, you’ve now managed to post on Instagram using Bluestacks!
Troubleshooting Bluestacks
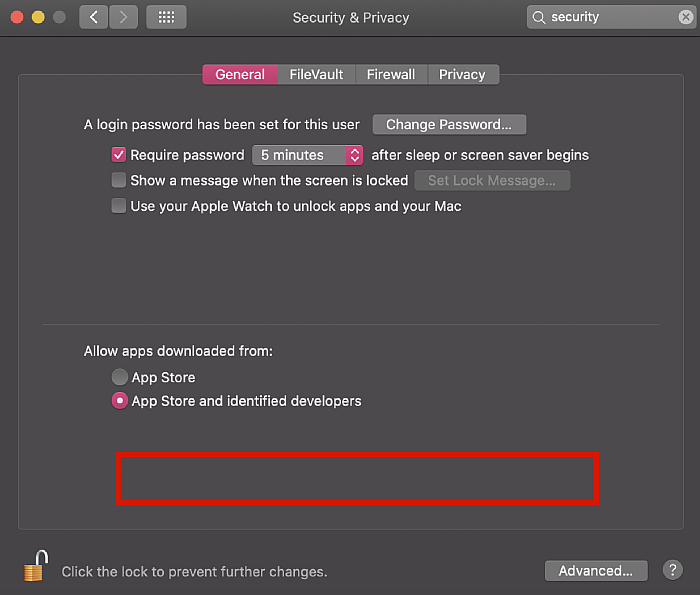
One of the most common issues for Bluestacks on Mac is that it doesn’t boot up after installation.
If it doesn’t load, make sure to go to System Preferences > Security > General and check if there’s no option saying “System software from developer ‘Bluestack Systems, Inc.’ was blocked from loading.” If there is, simply click “Allow.” Launch Bluestacks again and it should boot up properly now.
Excited about using Android apps on your desktop? Download Bluestacks today!
Via Greatly Social

Greatly Social is a social media management tool that helps you manage multiple social media accounts. Through it, you can make and schedule posts on Instagram, Twitter, Facebook, and other social media platforms. You can also use it to manage your YouTube account, website, and Google Business.
The ability to manage multiple social media pages is one of the ten reasons you should use a social media management tool, according to the social media marketing website Social Media Today.
Greatly Social’s web-based tool works spectacularly on a PC or Mac. I used my PC for this tutorial, connected my Instagram account, and easily made my post. My only issue was with the two-factor authentication, but I don’t know if that’s due to Instagram or GreatlySocial.
For example, when I was adding my Instagram account, I didn’t receive the authentication code from Instagram and had to disable it to add my account to GreatlySocial.
While this tutorial is for posting on Instagram from your computer, Greatly Social also has an iOS and Android app available. One of the features I liked about Geatly Social is that you can upload files from your Google Drive, Dropbox, and your PC.
In addition to these features, Greatly Social has 24/7 customer support and Spintax Support. You can also upload photos and videos, and Greatly Social has a video and photo editor that allows you to add custom watermarks to your posts.
Greatly Social supports social media analytics to use when assessing your content performance and making a content plan for your accounts. All of these features are available to every user, no matter your subscription plan.
The only thing that would make the app perfect in my eyes would be if I could turn off my Instagram comments from my Greatly Social dashboard. This aside, social media management tools, such as Greatly Social, can help benefit your business’s social media page, according to LinkedIn Pulse.

Greatly Social offers six different subscription plans, and you can pay monthly or annually. Here is the price per plan:
- Free – up to 8 social media accounts, 1MB storage, 1MB file size
- Personal $9/month – 8 social media accounts, 1,500MB storage, 1000MB file size
- Agency $14/month – 40 social media accounts, 3,000MB storage, 400MB file size
- Enterprise $24/month – 80 social media accounts, 6,000MB storage, 2,000MB file size
- Business $89/month – 160 social media accounts, 12,000MB storage, 4,000MB file size
- VIP $149/month – 320 social media accounts, 24,000MB storage, 8,000MB file size
Here is the price per user for each month for the annual plan:
- Free – up to 8 social media accounts, 1MB storage, 1MB file size
- Personal $7/month – 8 social media accounts, 1,500MB storage, 1000MB file size
- Agency $12/month – 40 social media accounts, 3,000MB storage, 400MB file size
- Enterprise $21/month – 80 social media accounts, 6,000MB storage, 2,000MB file size
- Business $79/month – 160 social media accounts, 12,000MB storage, 4,000MB file size
- VIP $139/month – 320 social media accounts, 24,000MB storage, 8,000MB file size
The difference between each plan is the number of social media accounts it supports, the storage available, and the maximum file size that’s allowed. A Free plan works for me, but if you’re looking for more, assess your needs and see which plan works for you.
With that being said, here’s how to post on Instagram from your computer via Great Social:
- Click Sign Up on the Greatly Social website.

- Enter the details for your new account and click Sign Up.

- Click Instagram on the GreatlySocial dashboard.

- Next, click Post.
This will allow you to make posts to your Instagram account.

- Click Add Account.
Before you can post using GreatlySocial, you must log into your Instagram via the platform.

- Afterward, Click Add Account under Instagram.
As mentioned, GreatlySocial allows you to manage multiple social media accounts, including Instagram, Facebook, Twitter, and more.

- Select the type of Instagram account you’re adding.
I chose Instagram personal.

- Enter your Instagram account details and click Add account.
As I mentioned before, I recommend disabling the two-factor authentication for your account before doing this.

- Close the notice about the new login detected.

- Click Instagram, then Post on the dashboard again.

- Upload your file for posting.
You can upload a photo, reel, story, or collage from your computer, Google Drive, or Dropbox. I chose to upload a photo from my computer.

- Select the photo.
I uploaded this Cyberpunk mask from Pinterest for this tutorial. To the right, you’ll see a preview of the post on your feed.

- Select the Instagram account to which you want to post.
You can do this before selecting your photo, but I did it afterward.

- Click Post Now.
You can schedule the post as well.

- You’ve successfully made an Instagram post from your computer using GreatlySocial.
Here’s a screenshot of my post.

Here’s a video of how to post on Instagram from a PC with Greatly Social:

FAQs
Can You Post On Instagram From Computer?
Yes, there are many ways to post on Instagram from your computer or laptop. Best of all, you don’t need to pay anything for these methods.
How Do I Post On Instagram From My Laptop?
You can do this in a variety of ways. You can use the web browser or various third-party apps, like Uplet, Bluestacks, or Greatly Social, among many others.
How To Upload Multiple Photos To Instagram From PC
There are a few options for doing this, but the simplest and most lightweight one is Uplet. You can also upload multiple photos using Bluestacks or Greatly Social, but these ones are a bit more complicated to use. That said, they also offer more features, especially Greatly Social.
Posting To Instagram From PC and Laptop For Free
See, there are many ways on how to post on Instagram from a laptop and PC for free. Gone are the days when you have to transfer your photos from your camera to your laptop, and finally to your phone again before being able to upload them to Instagram. Now, you can upload your best photos straight from your desktop for free!
If you experience issues with posting IG photos, check out this helpful post.
Did you like this article? What are your favorite methods for posting on Instagram from your desktop? Make sure to let us know your thoughts in the comments below!
Guys you can do this by downloading the website as an app in edge. Works just like it does on a mobile and its a lot easier.