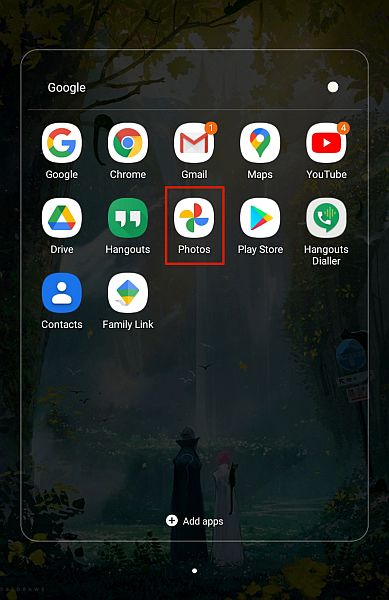
Here’s how to restore lost screenshots on Android – open Google Photos on your Android phone. At the top left-hand corner, click the three vertical lines then select Trash. Click the photos you want to undelete then click Recover to restore the selected screenshots from Google Photos to your phone.
Screenshots are a great way to capture something you see online. It could be a funny interaction you notice on Twitter that you want to share or an interesting part of an article that you want to save.
Sadly, sometimes you accidentally delete a screenshot or two and so you may wonder, “How do I get those deleted screenshots back?”
I’ve got you covered, here’s how to recover deleted screenshots on Android using 5 different methods.
Contents
5 Ways To Recover Deleted Screenshots
The methods I used to recover my deleted screenshots on my Android device are:
Solutions such as UltData by Tenorshare, Phone Rescue for Android, and Dr. Fone require a paid license to use, however they offer more recovery options than the recycle bin feature (Trash) in the Samsung Gallery app and Google Photos.
The latter two options also aren’t as capable of restoring permanently deleted screenshots like the former three, so keep this in mind when deciding which method may be right for you.
Recover Deleted Screenshots Through UltData
Tenorshare Ultdata is an Android device management solution that offers multiple functions that help you optimize your Android device’s usage.
Android data recovery is one of this app’s biggest strengths. This means UltData can recover deleted screenshots on Android.
Before you can do that, though, you need to pay for an UltData subscription first. The UltData Android recovery module costs $35.95 for a one-month license, $39.95 for one year, and $49.95 for lifetime access. This is for one PC and five mobile devices.
If this sounds like something you might be interested in, you can sign up now.
If you’re not so sure yet, I’ve also done a full review to help you decide better.
Once you’ve bought a subscription to this screenshot recovery software, you’re ready to recover deleted screenshots. There are two available methods to recover screenshots in Android, and I’ll go through each one.
Recover Screenshots Through Android Phone
It will take you about 5 minutes
Follow the steps below to recover screenshots from your Android device.
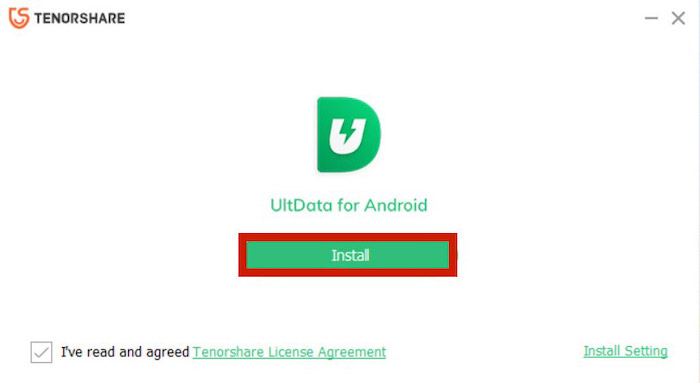
- Download and install the UltData app.
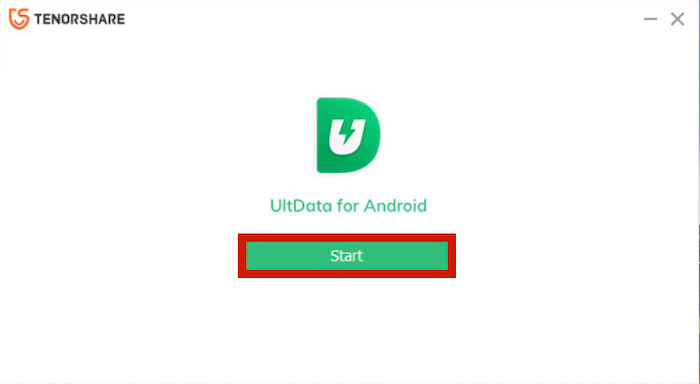
- Once it’s installed, go ahead and run the app by clicking Start.
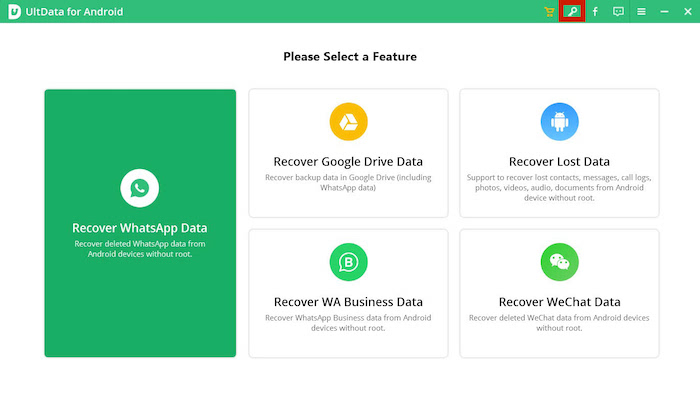
- This should find you on the app’s home page, where you can see multiple options. Before you do that, register the license you bought for the app by pressing the key icon on the top right corner.
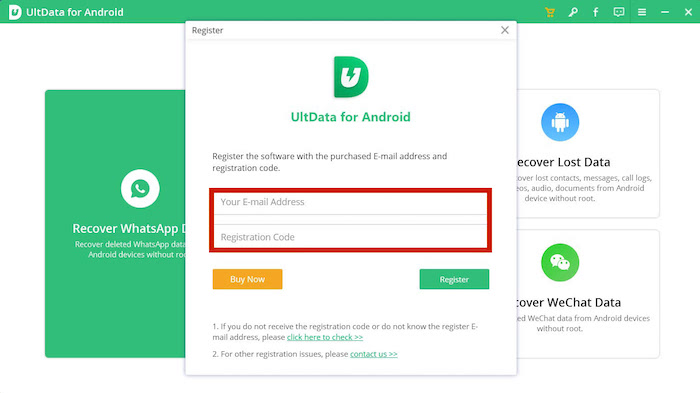
- Enter your email address and registration code in the field provided.
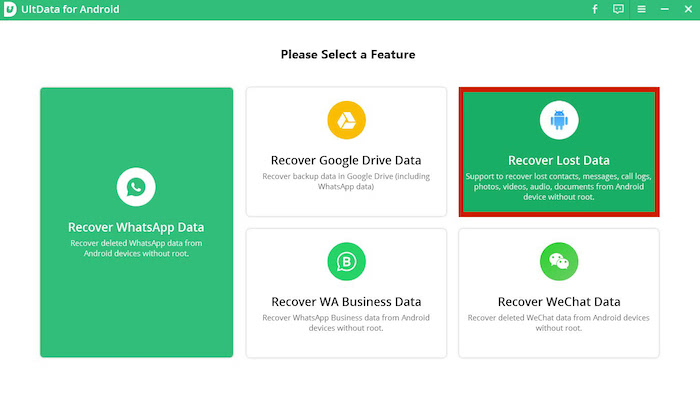
- Once it’s been registered successfully, you can now use the app to recover deleted screenshots on the Android device. Back to the app’s home page, click the Recover Lost Data option.
- Simply follow the on-screen instructions to pair your Android device with the app on the next screen.
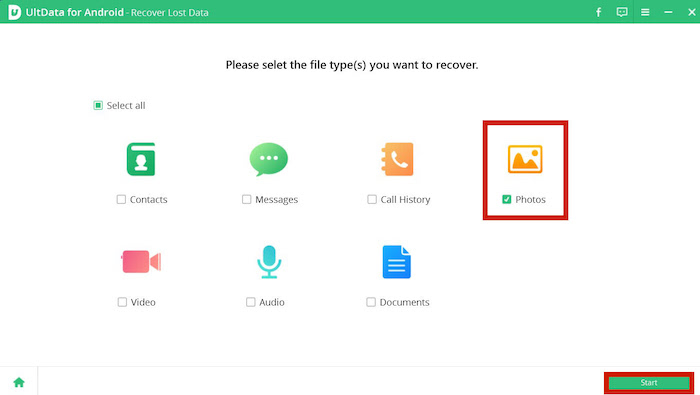
- UltData will then make you pick the kind of data it will recover. To recover screenshots, check the Photos icon, then click Start.
- The app will then scan your phone for a few minutes.

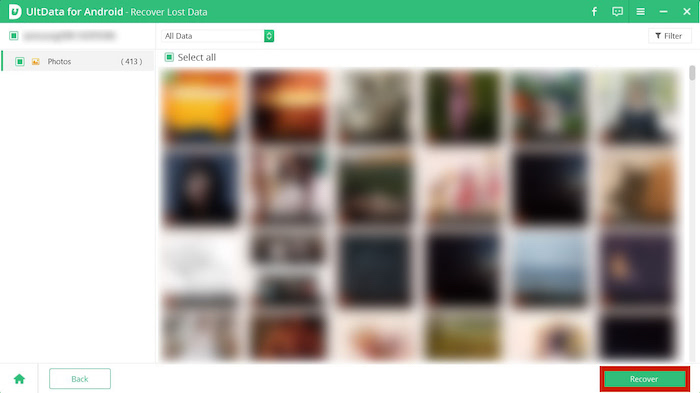
- Once UltData is finished scanning, the recoverable pictures will show up on the next screen. Simply look for the screenshot you want and click Recover.
Recover Screenshots Through Google Drive Backup
If you’ve made backups of your Android device beforehand, you can also recover the deleted screenshot you took by looking for it on the Google Drive backup you made. Follow the steps below to know how to recover.
- Open the UltData app and click Recover Google Drive Data.
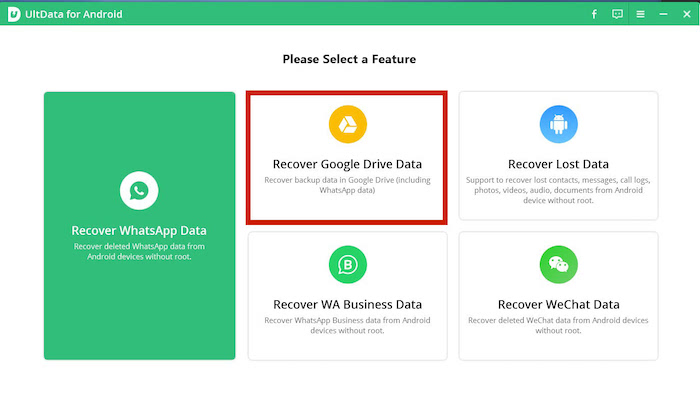
- Log into your Google Drive by providing your email and password.

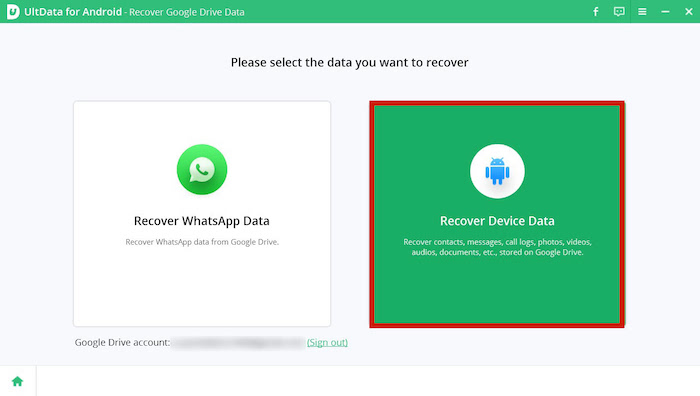
- On the next screen, you will have to choose what kind of data you would like to recover. Since you’re recovering deleted screenshots from your Android device, click Recover Device Data.
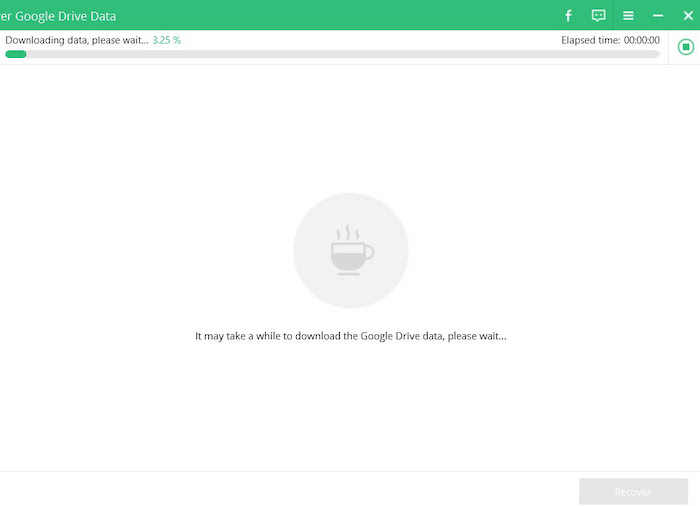
- Check Photos on the next section and click Start. The app will then scan your Google Drive account for the backup and show all the recoverable photos on the window.
- Click the screenshots you want to recover on the next screen and click Recover.
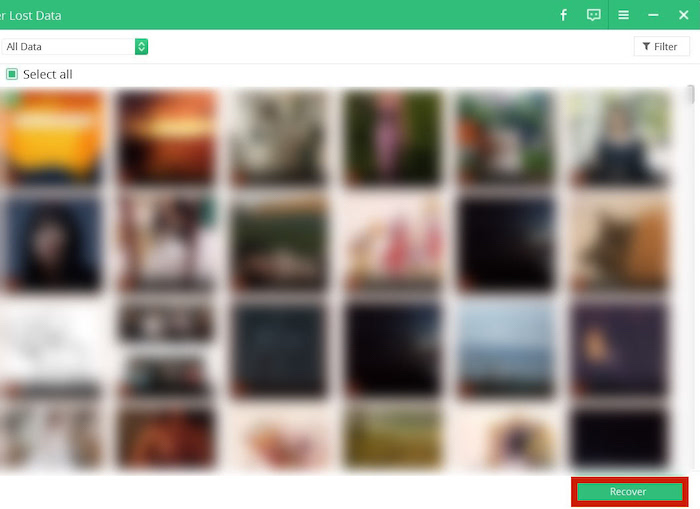
Congratulations, you’ve now recovered deleted screenshots through your Google Drive Backup. However, remember that this method only works if you’ve backed up your data to your Drive account before.
You can also watch this video from Tenorshare:
Using Phone Rescue For Android
Phone Rescue is data recovery software that allows you to recover lost or corrupted data on your Android or iOS device.
For this tutorial, I’ll be using Phone Rescue for Android. It works on both non-rooted and rooted Android devices, however, your phone needs to be rooted to recover your deleted screenshots. If it isn’t rooted, then Phone Rescue will only be able to recover existing data on your phone.
If you’re open to rooting your phone, Phone Rescue can do it for you during the recovery process. It’s safe and easy. If you want to learn more about Phone Rescue before you use it to root your Android phone, you can read our full Phone Rescue Review.
In terms of price, Phone Rescue for Android costs $39.99 per year for an annual subscription. There is also a lifetime license for a one-time payment of $49.99. Each of these options allows you to install Phone Rescue on one computer at a time. If you want to use Phone Rescue on multiple PCs, a 1-year Business License allows for Phone Rescue to be used on up to 10 computers.
- Purchase your Phone Rescue license and download the software onto your computer.
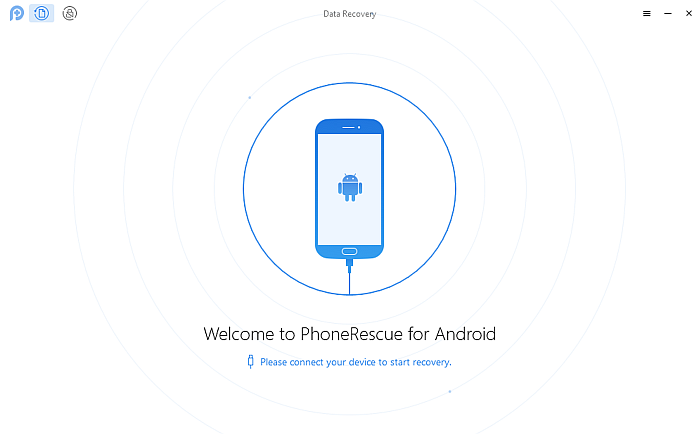
- Open Phone Rescue and connect your Android device.
- Once you’ve connected your Android device to your computer, Phone Rescue will automatically install its mobile app on your Android device then launch it to facilitate the recovery process.

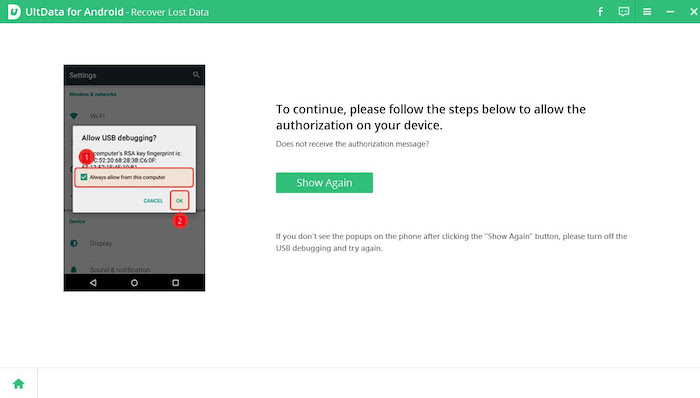
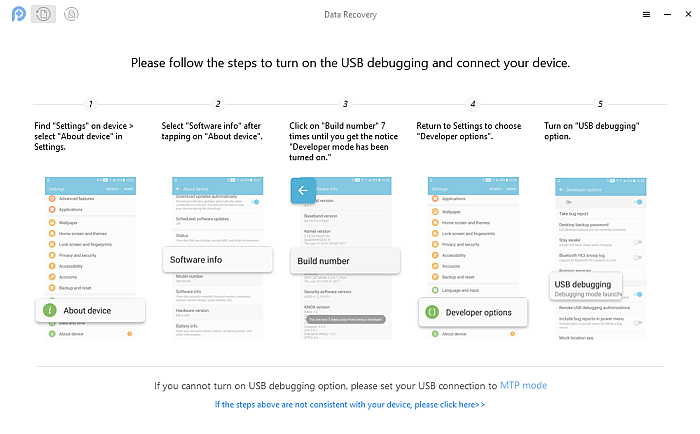
- USB Debugging is essential to use Phone Rescue with your Android Device. If USB Debugging is already enabled, you can skip this step. If not, you will see the following pop-up once Phone Rescue recognizes your device. Follow the instructions to enable USB Debugging on your Android device.
- Once the app installation is complete, the Phone Rescue software on your desktop will display the different types of data available for recovery.
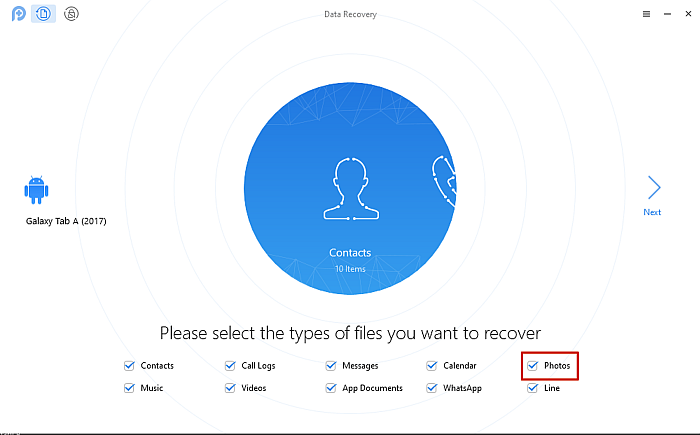
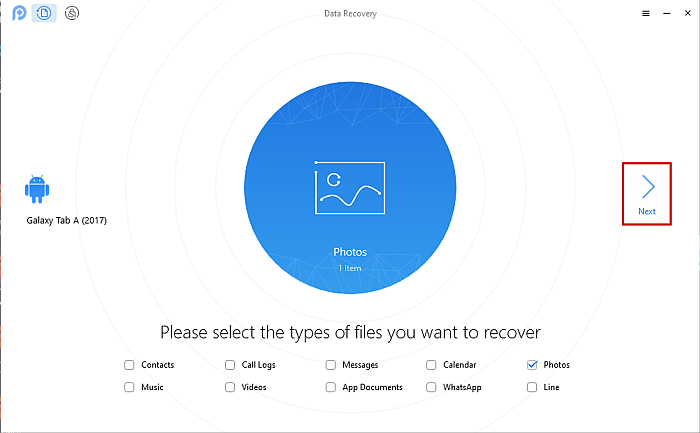
- Phone Rescue automatically selects every data category, but since the focus here is on screenshots, uncheck every option except for “Photos,” then click “Next” to recover your deleted screenshots.
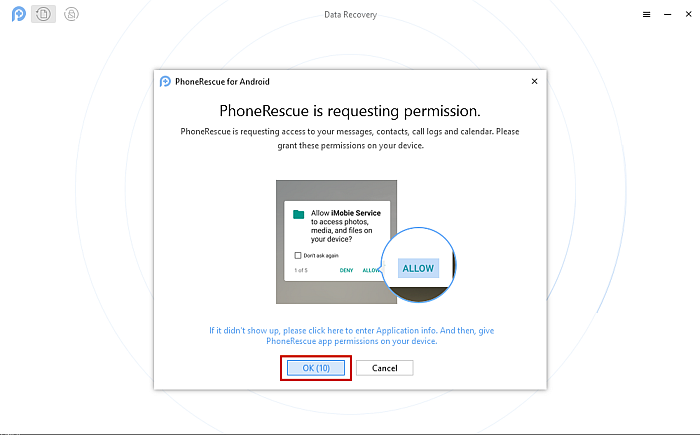
- Once you’ve done this, Phone Rescue will request permission to access the different folders on your Android device. You need to grant it access to your phone, then click “ok” on your computer to commence the scan.
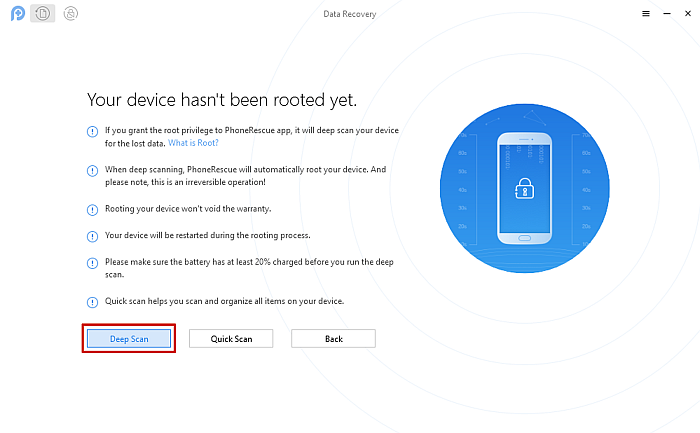
As I mentioned before, your Android device needs to be rooted for Phone Rescue to recover your deleted screenshots.
If you’ve rooted your Android device before, skip this step, if it isn’t rooted, you’ll get a warning like the one below, which shows you the difference between a “Deep Scan” and a “Quick Scan.”
A “Deep Scan” will recover as much of your deleted screenshots (photos in general) as possible, while a “Quick Scan” will only show the data that’s already available on your device. If you want to root your phone, Phone Rescue will do it without any additional charge, however, it will take longer.
- After you’ve made your choice, Phone Rescue will start analyzing your device.
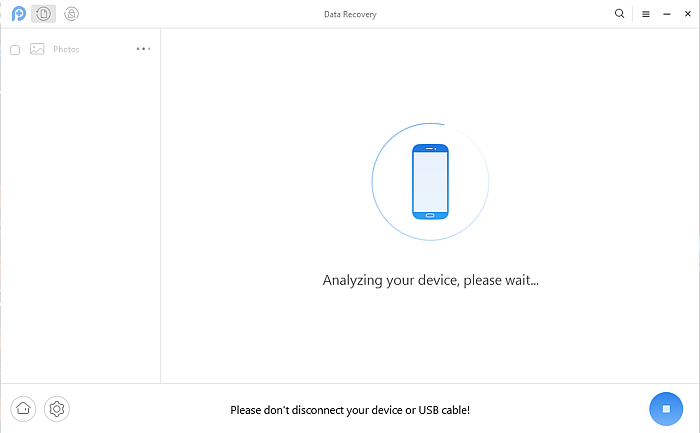
- Once the analysis is complete, all of your phone’s photos, (deleted screenshots and all) will be displayed. Phone Rescue also allows you to save your photos to your computer as well.
Here’s a video tutorial showing you how to recover deleted screenshots with Phone Rescue:

Phone Rescue isn’t only a great way to recover deleted screenshots either, it’s an overall terrific data recovery software for Android as well as iOS devices.
You can download Phone Rescue here in case you need to recover some precious data.
If you want to read more about its features, head over to our review.
Using Dr. Fone
Dr. Fone – Data Recovery is a data management software for Android and iOS devices. You can also use it to recover lost or corrupted data, such as pictures (in this case screenshots), videos, messages, and more.
The Android version works on both non-rooted and rooted Android devices. However, similar to Phone Rescue, your Android device needs to be rooted for Dr. Fone – Data Recovery (Android) to recover deleted screenshots.
Dr. Fone’s products are offered as offer annual subscriptions. The data recovery standalone offer, which covers up to 5 devices and works on 1 PC, costs $39.95 per year. There is also a 2-year option, which costs $49.95.
If 5 devices are not enough, you can get the Data Recovery package for 6-10 Android devices for $63.92 per year. Lastly, If you’re looking for the full Android toolkit, which includes data recovery as well as system repair, phone transfer, and more, the price is $79.95 per year.
Here’s how to use Dr. Fone – Data Recovery (Android) to recover your deleted screenshots on your Android device:
- Purchase your Dr. Fone license and download it onto your PC.
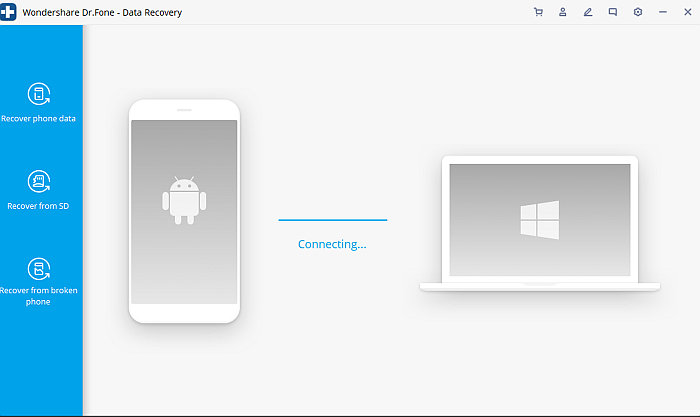
- Open the software on your PC and then connect your Android device to your computer. Once the connection is successful, Dr. Fone will automatically detect your Android device.
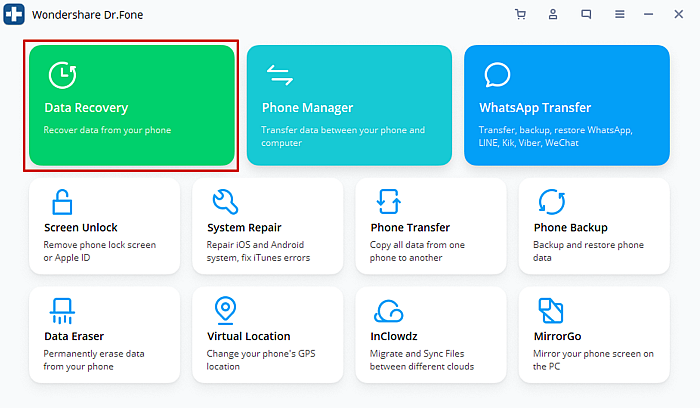
- Once your Android device is connected and Dr. Fone has recognized it, select the Data Recovery option from the list of available tools.
USB Debugging is necessary to use Dr. Fone with your Android device, if it is not enabled, you will need to turn it on before you continue. Dr. Fone will show you how through a mini-tutorial.
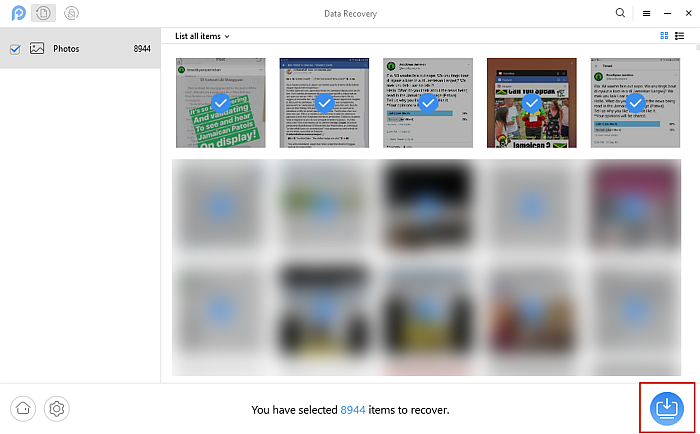
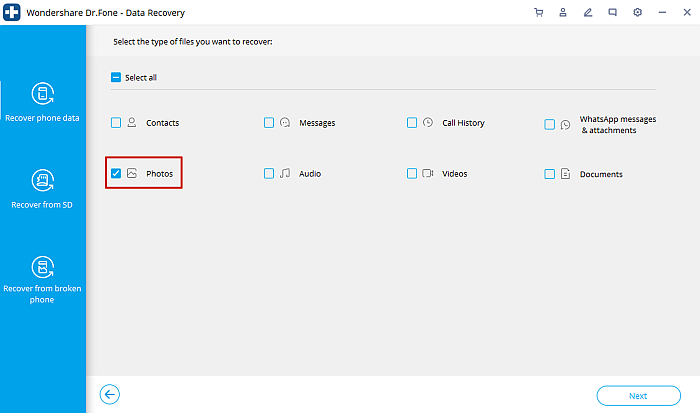
- Following your selection of the Data Recovery option, Dr. Fone will display all the data categories you can recover. Everything will be automatically selected for you. Since you only need screenshots, which fall under the Photos category, hit the “select all” option to deselect everything.
- After you’ve deselected everything, select Photos and click next to begin scanning your device.
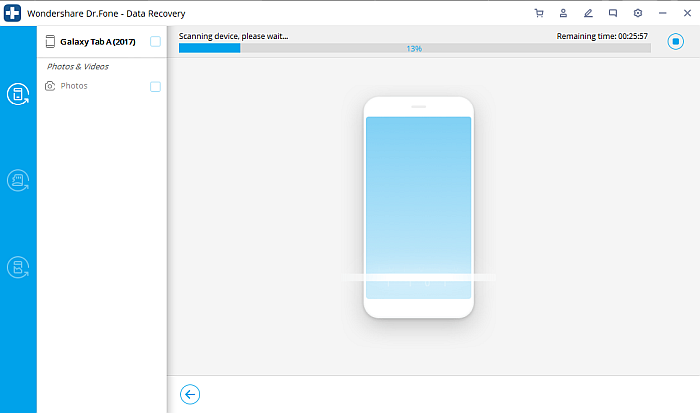
- Dr. Fone will then scan your device for all of its photos (which will include your deleted screenshots).
- Once Dr. Fone has scanned your device and recovered your screenshots, it will display them for you to see.
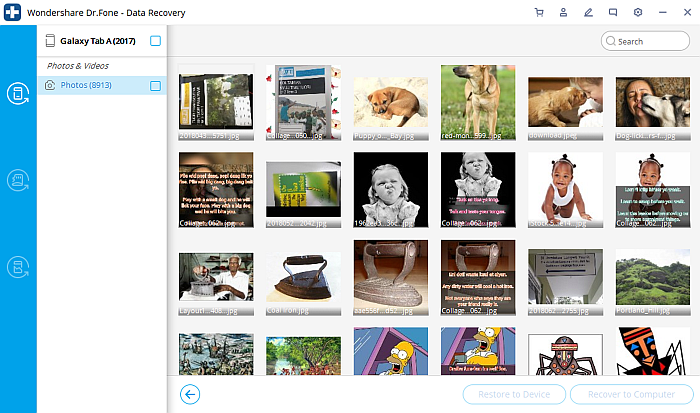
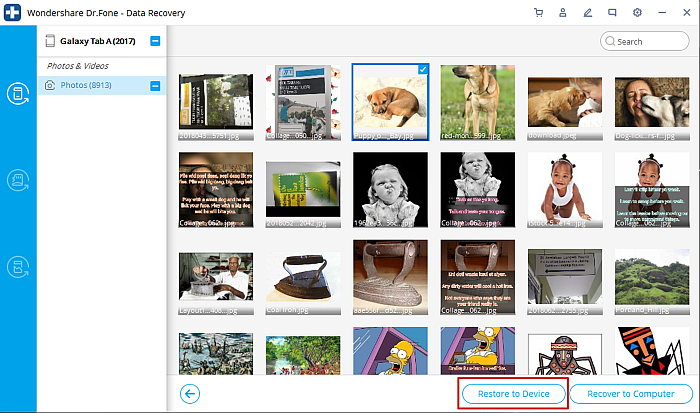
- One drawback to Dr. Fone is that your photos won’t be organized in folders when they’re displayed. You’ll have to search to find the deleted screenshots you want to restore. Once, you’ve found them, highlight them, and you’ll be able to restore them screenshots to your phone or save it on your computer.
If you prefer video tutorials, here’s a video showing how you can use Dr. Fone to recover deleted screenshots on Android:
As I mentioned before, Dr. Fone is a great data recovery tool for both Android and iOS devices. Download Dr. Fone and recover your deleted screenshots and other photos.
By Restoring From Trash (Samsung)
The Trash in Samsung’s Gallery app is its recycle bin feature to temporarily store deleted files.
It’s where your deleted videos and pictures are stored for two weeks before being completely gone. This way, you’re able to recover something, like a screenshot, that you accidentally deleted, and there’s some time to think about whether you want an image completely gone.
Here’s how to use the Trash feature to restore deleted screenshots on your Samsung device:
- Open the Gallery app on your Samsung phone/tablet.
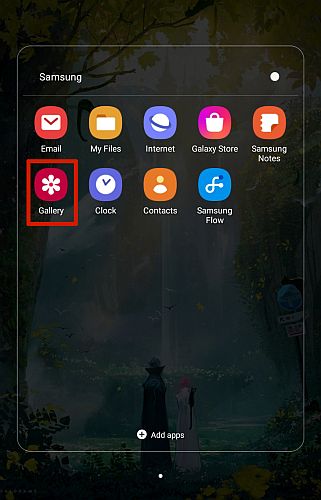
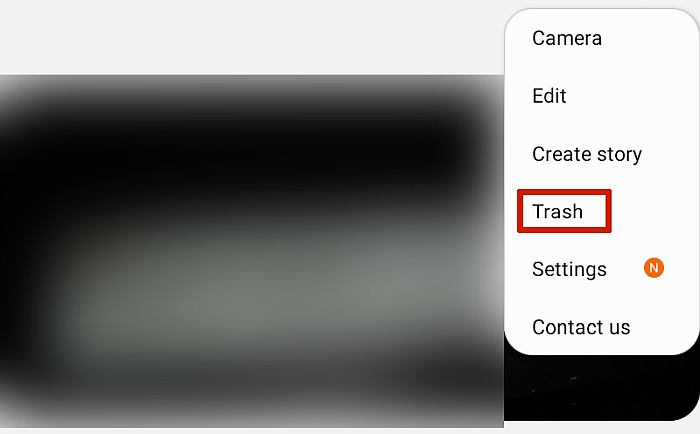
- Select the three vertical dots in the upper-right-hand corner of your screen.
- From the pop-up menu, select Trash, this will take you to the trash folder, where all of your deleted pictures and videos are stored.
- Once you’re in the trash folder, select the image(s) you want to restore to your gallery from the Trash.
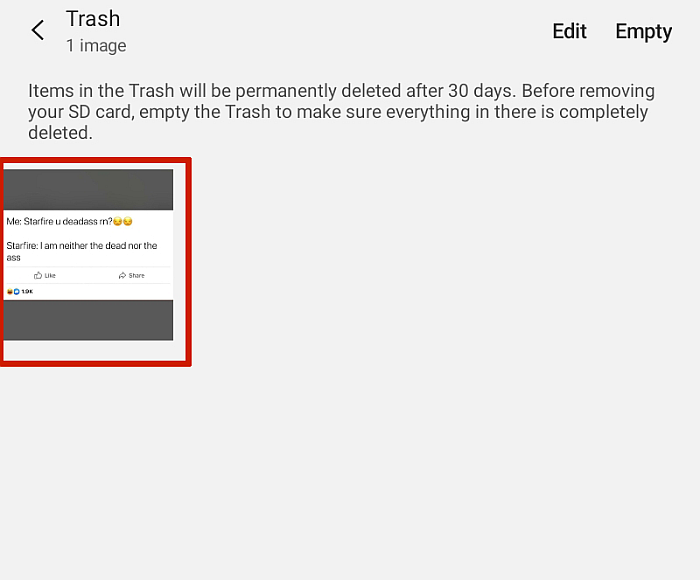
- Hit the restore button at the bottom of the screen to restore your selected screenshots from the Trash to your main gallery.
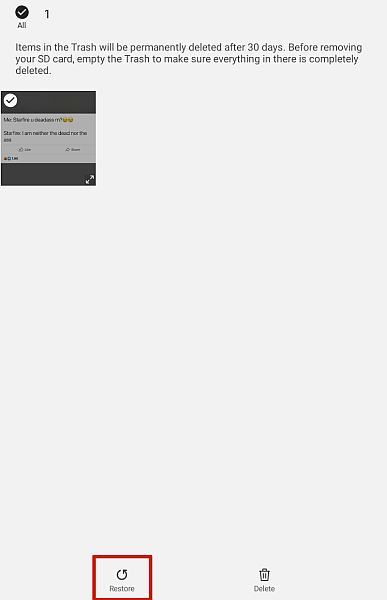
- Your selected screenshot(s) will return to your Screenshots folder or the folder where you deleted them from.
Here’s a video tutorial on how to recover deleted screenshots from the Trash folder on your Samsung device:

By Restoring From Google Photos
Google Photos is an image sharing and storage service that Google offers. You can use it for both Android and iOS devices. You can also enable it to automatically back up all of your pictures and videos on your device for safekeeping.
Here’s how to restore deleted screenshots from Google Photos:
- If you don’t have it already, install the Google Photos app from the Playstore.
- Open the app.
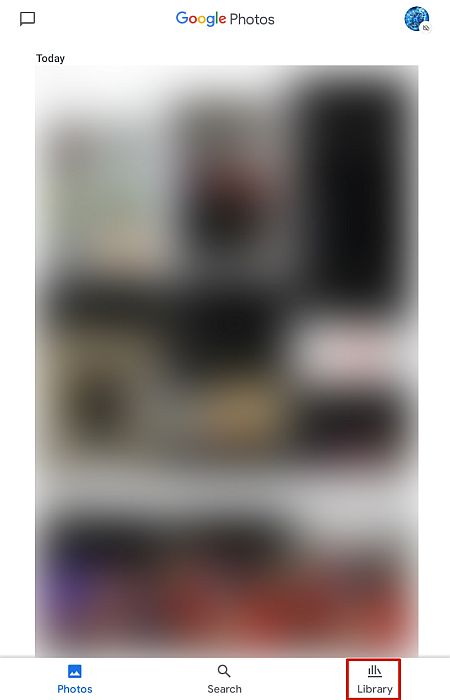
- Tap Library at the bottom of your screen.
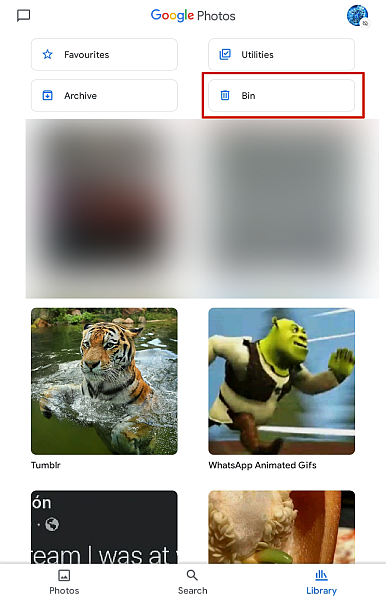
- Now, tap the Bin to open the recycle bin.
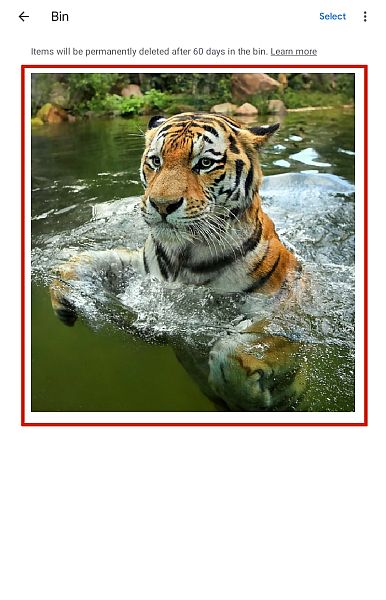
- Here, you’ll find your deleted screenshots waiting for restoration. Select the images you want to recover.
- Once you’ve selected the screenshots you want to recover, tap the Restore button at the bottom of the screen.
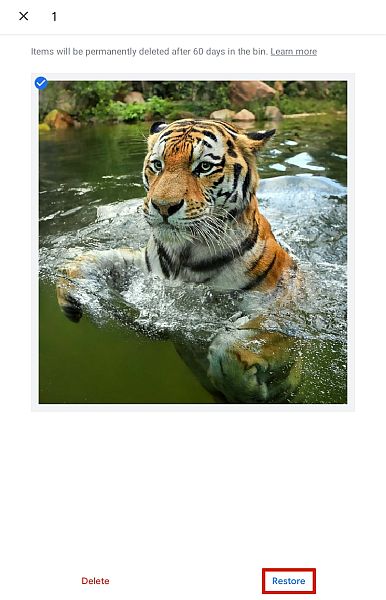
Your screenshots have now been restored to their original location.
Here’s a video tutorial on how to recover deleted screenshots using this method:

FAQs
Is there a deleted photos folder on Android?
Unlike iOS devices, Android devices do not have a deleted photos folder. When you delete photos on your Android device, you can’t get them back unless you have a backup or use a data recovery tool, such as Dr. Fone, which allows you to recover lost/corrupted data.
Where do Android deleted files go?
When you delete a file on your Android, the file doesn’t go anywhere in particular. It remains in its original position in your device’s internal memory until its spot is overwritten by new data. While the file location is the same, it becomes invisible to you in the Android system.
Is there a recycle bin on my Android phone?
Your Android phone does not have a recycle bin. Unlike a Mac or a Windows PC, your Android phone has limited internal storage (32 GB-256 GB). This is too small to hold a recycle bin, so in the interest of saving space, your Android phone doesn’t have one.
Can photos deleted from gallery be recovered?
Photos deleted from the gallery can be recovered. Even when you delete pictures from your phone’s Gallery, you can find them in Google Photos until you permanently delete them there. When you go to Google Photos, you can select the deleted photos and choose “Save to device” to restore them.
How To Recover Deleted Screenshots On Android – Wrapping Up
How’d you find the article?
I hope you found a method to restore your deleted screenshots on your Android phone that works well with your device and budget.
While Google Photos and the Trash feature on Samsung phones are great, sometimes they don’t work as well as the more premium options, such as Dr. Fone – Data Recovery (Android), Phone Rescue for Android or UltData.
Our favorite solution is with Phone Rescue.
They work with any Android device including Samsung and offer more in terms of data recovery such as restoring deleted call logs.
It’s good to have as many available tools as possible, so you can protect your data and have yourself covered in case something bad happens. I hope you liked this article! Be sure to share it with your family and friends, especially those who you know love their screenshots.
If you are looking for a similar solution but on an iPhone, check out this article.
Also, if you’ve used any of the methods I’ve mentioned, share them with me and the other readers in the comments!