If you use WhatsApp regularly, the chances are that you’ve saved a lot of photos over time. However, you can quickly free up some space by transferring these media from iPhone to PC or Mac or transferring through iCloud Drive or email.
WhatsApp is a convenient messaging tool. It’s full of features that we use daily, for example, to send pictures, videos, and other media files.
However, since WhatsApp media files can be downloaded to your iPhone, you might run out of space if you use it a lot. You may also be worried about accidentally losing your files, something that a secure backup can easily remedy.
In this article, I’ll discuss how to transfer WhatsApp media from iPhone to PC and Mac so that you can regain space and keep a safe backup of your files at the same time.
Contents
4 Ways To Transfer WhatsApp Media From iPhone To PC Or Mac
There are several ways to transfer WhatsApp photos and other media files to your desktop or laptop.
You can do this by using file explorer to directly transfer from iPhone to PC or Mac, using iCloud Drive, or even email.
Using File Explorer To Transfer From iPhone To PC
Before we begin, it’s important to note that I’ll be using “PC” throughout this article to refer to laptops or desktops running Windows OS. Mac, of course, will refer to any macOS system.
By far, the simplest way of transferring photos from your iPhone to a computer is by using your PC’s built-in file explorer. This way, you can simply navigate to where the media files are located and manually copy them into your PC.
However, there are some downsides to this method. You need to physically hook up your iPhone to the PC, so it may be hard to do it on the go, especially if you don’t have the right cable or adapter. And if you have many WhatsApp files to transfer, this method can take a long time.
But if you don’t mind this, follow the steps below to use file explorer:
- Connect your iOS device to your PC with the correct cord. Make sure it’s MFi-certified to ensure a smooth data transfer process.
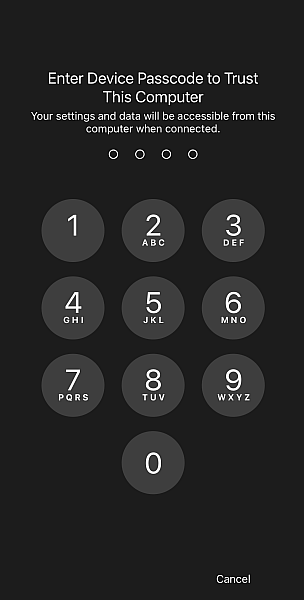
- If it’s your first time hooking up your iPhone, or if it’s the first time in a while, you’ll be asked whether you trust the computer or not. Click Trust.

- You then need to unlock your iPhone so that it can properly sync with the PC. This can be done using your passcode, your password, or your FaceID/TouchID.
- On your computer, open File Explorer. You should see your iOS device on Explorer. Look for Apple iPhone and click it.

- From the Apple iPhone menu, go to Internal Storage.
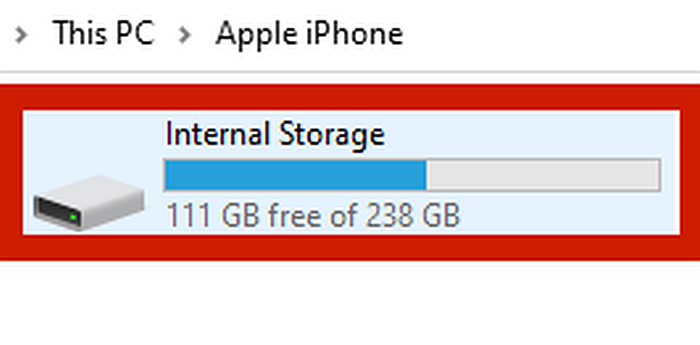
- You should see a file called DCIM. Click that.

- The DCIM folder should contain all of the photos saved by WhatsApp, though you may still have to scroll through your folders to find them. Highlight all of these files, and then right-click and choose Cut.

- Navigate where you want the copied files to be pasted, then hit right-click on your mouse and choose Paste. This will remove the WhatsApp files from your iPhone and transfer them to a location you specified on your PC.

Now, you’ve successfully transferred media files from iPhone to computer.
If you choose Copy, the images won’t be deleted from the iPhone. This is ideal if you just want to back up your WhatsApp media but don’t actually want to delete them.
Using Image Capture To Transfer From iPhone To Mac
Your Mac also has a built-in file explorer, and while you can use that to manually cut and paste the files just like in the previous method, there’s a much easier way to do it.
Mac devices feature a built-in Image Capture that automates the photo transferring process between Apple devices. In this tutorial, I’ll be using this instead of File Explorer.
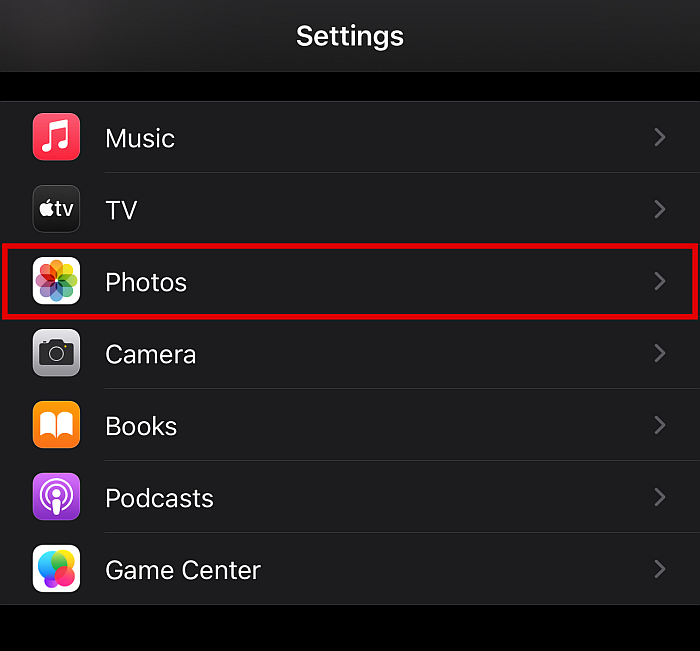
- Before connecting your iPhone to your Mac, go to your iPhone’s Settings. Scroll down until you see the Photos option, and tap that.
- Once there, scroll to the very bottom until you see the Transfer to Mac or PC category.

- Under here, you’ll see two options, Automatic and Keep Originals. For newer iPhone models, the default format is HEIC. Windows and Android systems can’t natively open this format, so if compatibility is a priority, make sure to select Automatic. If you’re only planning to open the files on Mac or iPhone, choose Keep Originals.

- Next, it’s time to connect your iPhone to your Mac device using the proper MFi cord. Wait for your device to be recognized.
- Open the Image Capture app.

- If you have a secured lock screen, you have to unlock your iPhone using your passcode, password, or Touch/Face ID.
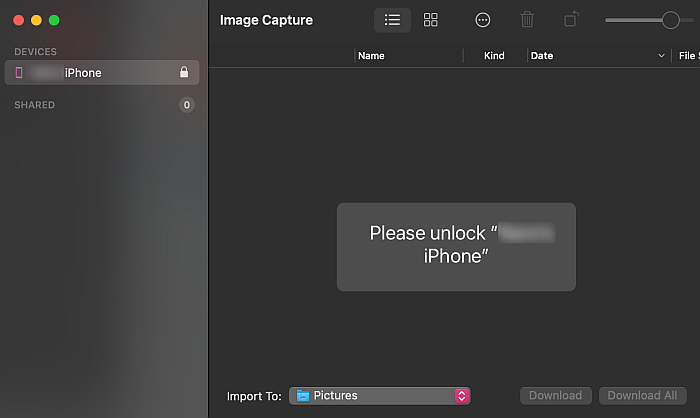
- After your phone is unlocked, you will see all the media files on your iPhone detected on the Image Capture app.

- Highlight all of the images that you want to import to your Mac.
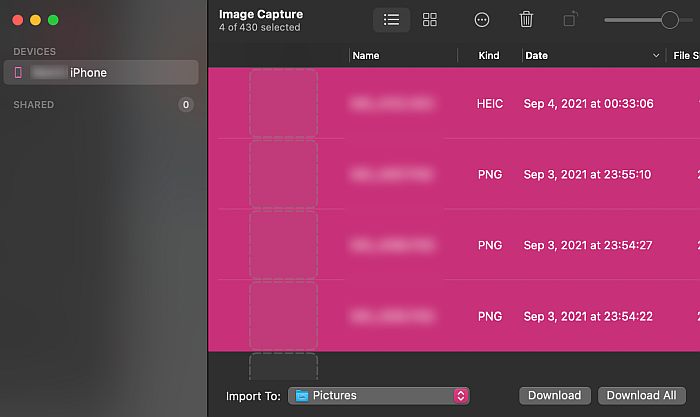
- Next, you’re going to need to designate a place on your Mac for the captured images. On the bottom of the Image Capture window, click the field next to the Import To button. This will display a list of all the folders on your Mac to direct the imported photos.

- If you want to create a new folder, scroll down the pop-up menu and click Others.

- In this window, click New Folder.
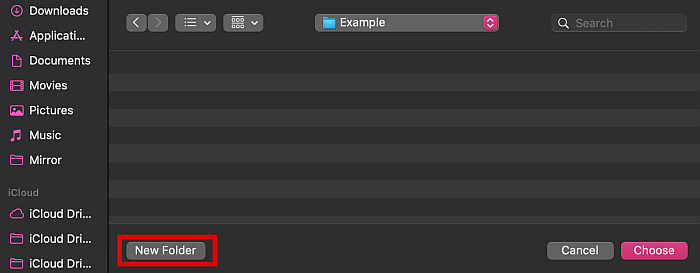
- Type your desired folder name and click Create.

- You’ll automatically go back to the previous screen. Click the Choose button to pick that import destination.

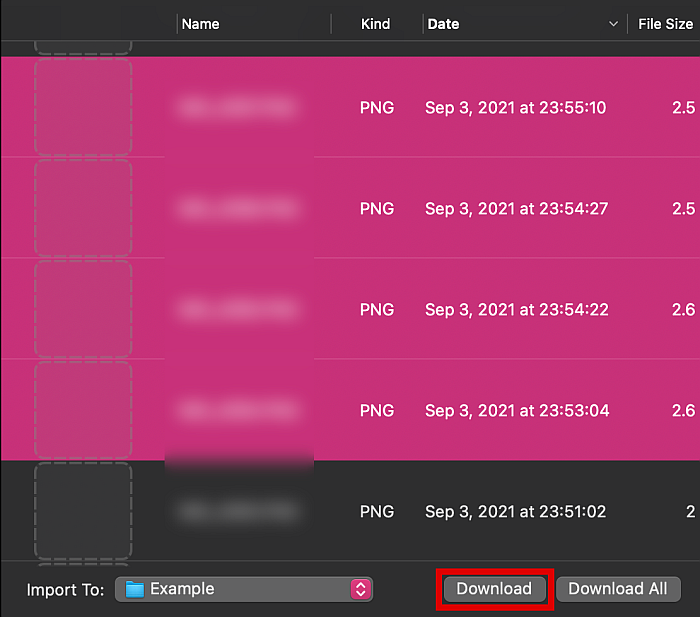
- On the next window, make sure that all files you want to import are still highlighted. Then click the Download button on the bottom right corner of the Image Capture interface. This will import the photos to the folder destination that you selected.
Using iCloud Drive To Transfer WhatsApp Photos
You can also backup your media by directly transferring your WhatsApp conversations to iCloud. This will save all of that conversation’s chats, media, and stickers to the cloud. From there, you can then download the data to another iPhone or Mac device.
This method doesn’t require you to plug your iPhone into a computer, so you can do it from anywhere, as long as you have an internet connection. However, depending on your internet speed and the size of your files, this could be an extremely slow method.
If that sounds good anyway, follow the steps below.
- Open WhatsApp and pick the chatbox that you want to transfer photos from.

- Tap on the contact details of the person by clicking their name at the top.

- This action should bring you to the contact details screen to access more options for the conversation. From there, scroll down until you find the Export Chat button and tap that.

- From the pop-up, tap the Attach Media button.

- You will then be brought to another menu. From here, pick Save to Files.

- Then choose iCloud Drive.
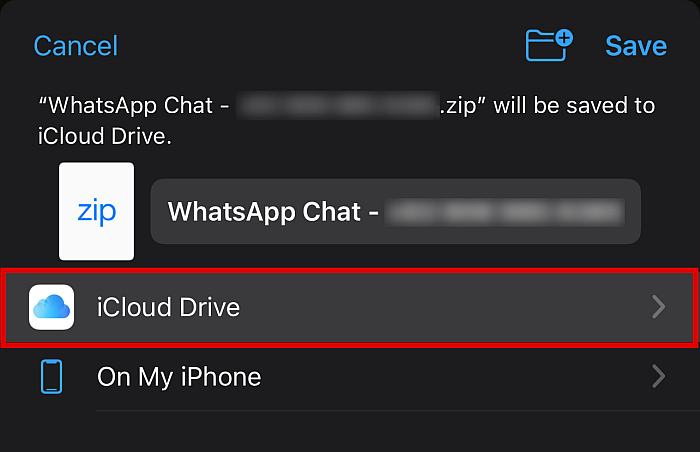
- From the options, tap Add or Save. This will upload the media files to iCloud individually. Simply repeat if there are more media files that you want to upload.

- When the media files have been uploaded to your iCloud account, you can download them anywhere, whether to another iPhone or to a Windows or Mac computer. This will contain everything from the chat, such as chat history, photos, videos, audio, and even stickers.

Now you’ve successfully followed the procedures to backup WhatsApp so you can download your data anywhere.
Using Email To Transfer WhatsApp Photos
Just as you can upload individual chat boxes to the cloud, you can also send them through email.
This method can be used to upload the entire conversation, including chat history, media files, and even stickers. You can use this method whether you’re using WhatsApp for Android or iPhone. The emails containing the uploaded files can be downloaded and read on both Mac or Windows.
That said, although it’s convenient, this method can only accommodate a fixed amount of data. If you have many media files, you may not be able to transfer or backup them all.
There are multiple ways to transfer WhatsApp photos using email, and we can’t cover all of them here. If you want to know more, check out our extensive coverage in another tutorial article.
FAQs
Where Does iPhone Store WhatsApp Media?
iPhones typically store WhatsApp media under the DCIM folder, which you can easily locate with your iPhone file manager or a computer’s File Explorer.
Where Are WhatsApp Files Stored On Mac?
WhatsApp files are not stored in a specific place on Mac, since you can designate the location when importing media files from your iPhone. You can choose an existing folder or create a new one for those files. This can be done through the Image Capture app on Mac.
Can I View iPhone Photos On My PC?
You can view iPhone photos on your PC, as long as they’re not in HEIC format, which can’t be natively read by Windows or even Android systems. To view them, you need third-party programs, or you need to convert the format to a readable one like JPG or PNG first.
That’s How To Transfer WhatsApp Media From iPhone To PC Or Mac
There are many reasons why you may want to transfer WhatsApp media from iPhone to PC or Mac.
For instance, if you use WhatsApp often, you’ve probably already accumulated a lot of photos over time. These may cause you to run out of storage. You may also be worried about accidentally losing them.
Luckily, you can easily transfer WhatsApp media to your computer or laptop by hooking up your iPhone to PC or Mac, uploading the conversation to iCloud Drive, or exporting them via email. With these methods, not only can we free up space, but we can also ensure that the photos we have are always kept safe.
Did you like this article? Let us know in the comments below!