Are you a video blogger who is struggling to create professional videos? Even if you are able to do so, it is taking a lot of time to get all the text in the audio correctly and in natural flow? If this seems to be your story then follow this tutorial to know how you can add teleprompter to Android Camera and easily take professional videos in one go.
With live-streaming being a part of our lives, I’m sure that you’re no stranger to being in front of a camera. You just love it when that camera is pointing in your direction and you usually know what to say. But, what if what you have to say is longer than usual?
Wouldn’t it be great if it didn’t look like you are reading off something or need to start over because you completely forgot your lines? It can be a real disaster having to start over, especially if it’s a long video. There is an app that can help you look like a pro without letting anyone know about the extra help.
Contents
Easily Add Teleprompter to Android Camera
To get things started, the first thing you need to do is install the Selvi – Teleprompter Camera app. The app is free and waiting for you to download it from Google Play. The only permission the app asks for is to access your camera, which is a logical permission to ask for.
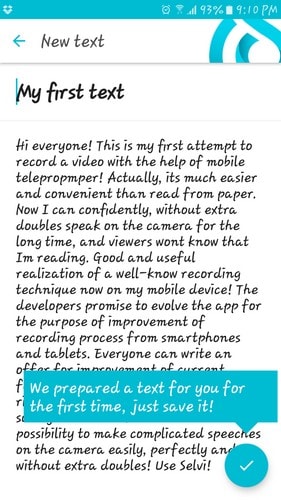
The app will also ask if you want to go through an intro or not. I always recommend you do since you might learn something new. I went through the intro which was actually pretty short. If you want to test out the app without having to think of what to type, the app creates a sample text for you to read.
The app also allows you to import a narration you might have elsewhere. This is a great option since typing on your computer is a lot easier than typing it on your phone, especially if it’s something long.
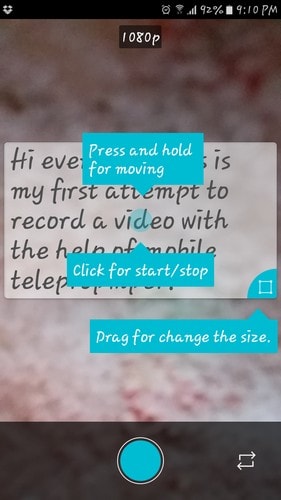
At the top of your display, you will see the resolution you’re going to be recording in. It’s automatically set to 1080p, but if you tap on it, you can either choose between VGA or 720p.
How to Customize Your Teleprompter Text
There is going to be a drag icon at the bottom right that will allow you to adjust the size of the box on your screen. If you want to do a test run with the text without recording you can. Just tap on the blue dot in the middle of the text and it will start moving.
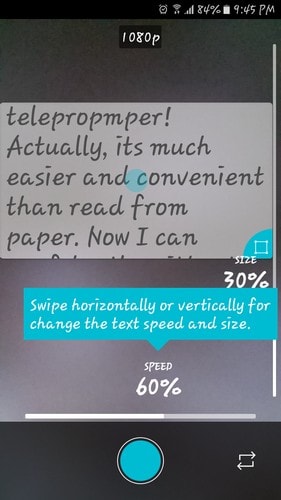
A few tricks some might not know about is that you can also change the text size and the position of the text. While I was testing the app, it showed me a slider at the bottom of the screen where I could adjust the size of the text. Once I selected the size, it would disappear and never came back.
To change the size of the text slide your finger to the side of the box (I tested it out on the right side, the inside of the box) If you slide your finger on the outside of the box, then you’re going to change the size of the text.
Just slide your finger up and down until the text is at a size you like and then simply let go. The text will adjust automatically.
Another hidden feature is that you can easily change the speed the teleprompter. The app doesn’t indicate where to press but from the looks of it, you can tap and then slide to the sides, right about anywhere at the bottom. Between the text box and the record button.
Android users should also go through the following handpicked tutorials.
1. How to Translate Any Android App Into Any Language
2. How to Automatically Switch to Strongest WiFi Signal on Android
Conclusion
Thanks to this app, you’re going to look like a professional next time you have to record a video where you need to talk. If you press the button at the bottom right with the arrows, you can switch cameras.
So, if you’re ever recording a video where you need to talk but you’re recording something that’s not you, now you now how to do it. What kind of video are you going to record with the teleprompter app? Leave a comment and let me know.


