Spotify by every means is the best music streaming app available. Using Spotify you can easily stream your favorite music online and with the premium membership of the app, downloading the desired songs is also possible. But what if you don’t have the premium membership and still want your songs offline? Well, this is where the recording plays its part.
When you record your Spotify songs, you have them offline and now you can listen to them without any barrier placed by Spotify. Not just for offline listening, there can be many other reasons to record songs. But the main point is that we have got a hack for you that will record Spotify songs and that too using Audacity, one of the most famous audio tools.
Related Read: 7 Best Apps With Spotify Integration
Record Spotify Music
The interface of Audacity might seem to be quite confusing but it is really easy to record the music using this software. Moreover, choosing Audacity is the best option because the software is absolutely free of cost.
Note: The steps can only be followed using a computer – Windows PC or Mac as Audacity is not available for mobile devices.
1. Open Audacity on your desktop. If you don’t have it already then you can download Audacity from their official site and install it.
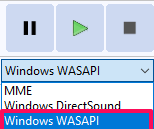
2. Now, under the Audio Host drop-down menu on the left-hand side, select WindowsWASAPI. If you are using a macOS, choose Core Audio.
3. You have to be sure that the speakers used for audio output are common for both, Audacity and your desktop. For that, click on the speaker icon at the bottom right of your taskbar. After clicking, you will be able to see the name of the speaker used by the desktop.
4. Now go back to Audacity and check the speakers used by the app under the Playback Device menu. If the speakers are different, select the same speakers as of the device.
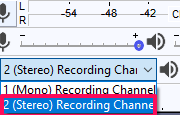
5. After that, go to the Recording Channels and select 2 (Stereo) Recording Channel, if not already.
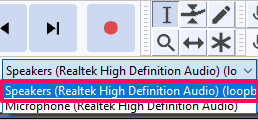
6. To make sure that no sound from any external source gets recorded while recording the Spotify music, go to the Recording Device and select Speakers.
Now the Audacity is all set to record your Spotify songs.
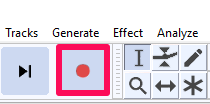
7. To record the song without missing it from the very start, click on the record icon (square box with a red dot), before playing the music from Spotify.
8. Now open the Spotify app and simply play the music you desire to record. Your music is now getting recorded.
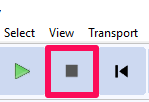
9. When the song ends or whenever you desire to stop the recording, simply press the spacebar key or the stop icon.
Saving The Recorded File
With this, the recording has been successfully completed. Now you have to save the file locally on your device. If you wish, you can listen to the recorded music before saving it, just to be sure if it’s as expected or not. After that follow the given steps to save the file.
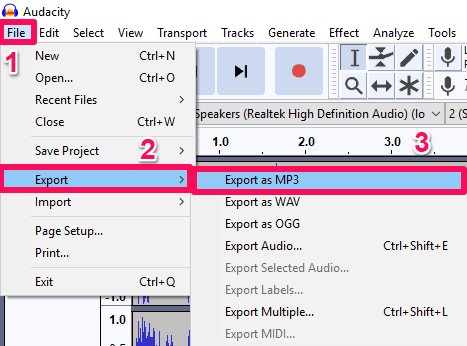
1. Click on the File option on the extreme top-left of the screen.
2. After that, hover to the Export and then select Export as MP3. If you wish, you can choose other formats for your recorded file.
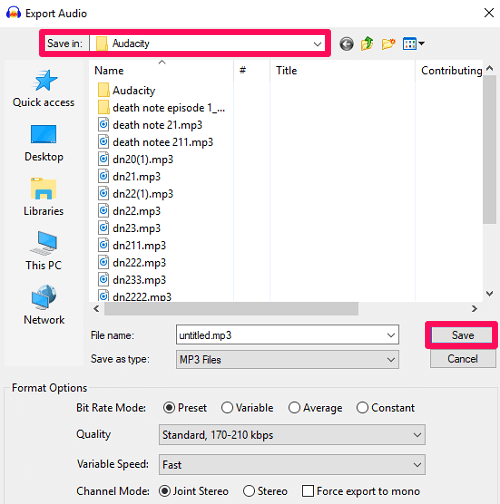
3. On the next screen that appears, choose the location and name for your recording. Other changes can also be made under the Format Options if you like. After that, click on Save.
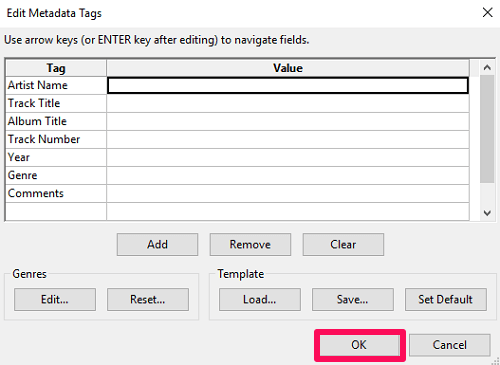
4. Finally, click on OK to save the recording locally. You can also edit the various fields like Artist Name, Genre, etc.
Recommended Read: How To Sign Out Of Spotify On All Devices
Wrapping Up
Audacity, no doubt will work as the best app to record music from Spotify and that too for free. The recording is just one of the various amazing features provided by Audacity. The app can be of great use for singers and music developers too. It provides almost every feature that can help you design the music. Moreover, Audacity is solely being designed for everything related to audio, so there is no chance for any type of quality distortion while recording music.
