If you’re using Discord for a while now, then you must have joined multiple discord servers. And while being a member of those servers, thought of creating your own discord server and inviting other people to join it must have crossed your mind. Now, creating a new discord server is a short and easy process, but managing that new server is a whole lot of work. Like after creating a new server, the very first thing that should be done is inviting friends to that server. Also, it may be that you would want to create different text and voice channels on that server.
Now that all sounds pretty hectic and time-consuming, doesn’t it? Well, don’t worry because we’ve got you covered on this. Just go through this article to be able to create your perfect Discord Server.
Note: The steps to create discord server and invite someone on the desktop app for Windows and Mac are almost the same with the steps on the mobile app for Android and iOS.
Contents
Create Discord Server
Creating a discord server is a very easy and short process, and the steps to do that are almost similar for desktop and mobile apps. So we are going to mention the steps for the desktop app, but these steps can also be followed on your Android and iOS smartphone to create a new server on Discord.
1. Launch Discord app on your PC or just log into your Discord account on the web browser.
2. After getting to the activity section, click on the + icon which is exactly above the search icon on the extreme left of the discord screen.
3. Now, you’ll be asked to join a new server or create your own server, click on “Create a Server.”
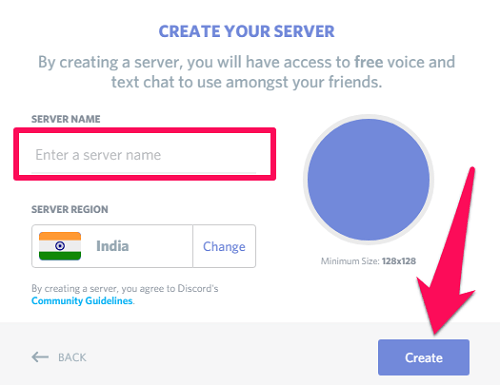
4. Enter the name for your new server and change the server region if it doesn’t match your true location. Here, you can also assign an icon for the server if you want. And after you’re done with the details, just click on “Create” to create your new Discord server.
Invite Someone To A Discord Server
As soon as you’re done creating your new discord server, the very first thing you need to do is invite people to your server. And that is why just after creating your new server, you get the link that can be shared with people to grant access to that server. But if for some reason you haven’t got the invitation link generation screen after creating a new server, or you want to create invitation link for an old server, then just follow these steps:
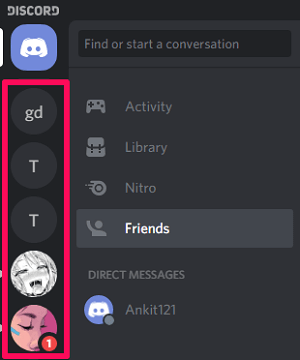
1. From the list of servers at the extreme left side of the screen, just click on the server on which you want to invite the members.
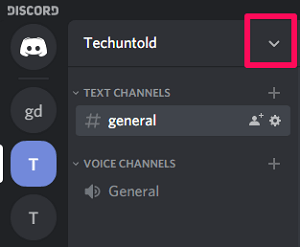
2. After that, click on the drop-down arrow which is on the right side of the server name.
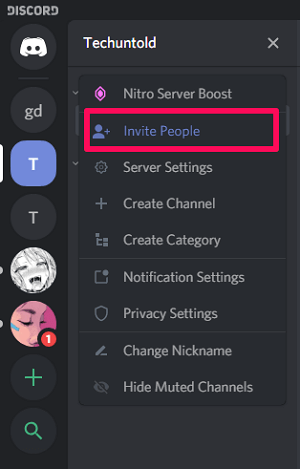
3. Now, just click on the “Invite People” option to open the invitation link generation screen.
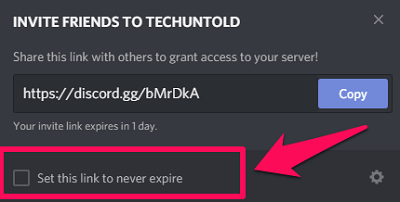
Now, by default, the invitation link will be set to expire in a day. But if you want it to never expire, then you can check the “Set this link to never expire” option at the bottom.
Also, if you want more options for the expiry date for the link, then you have to click on the settings icon which is on the extreme right corner of the invitation link screen.
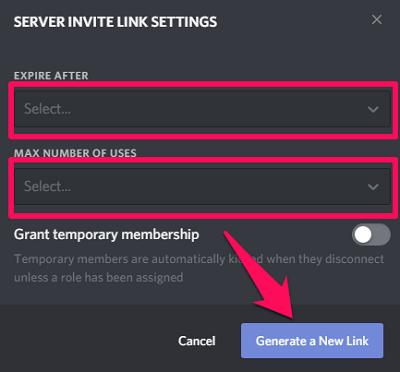
After clicking on the settings, you get the option to change the “Expire After” time for the link. And with that, you can also set a limit to a maximum number of uses of that link. After you’re done setting both the limits, just click on “Generate a New link” option.
Now just copy the generated link and share that with your friends to invite them to that server.
Create Discord Channel And Category
Apart from creating discord server, you can also create different Discord channels and categories by following the given steps:
Create Category
1. Presuming you’re already on the Discord app, click on the server under which you want to create a new category.
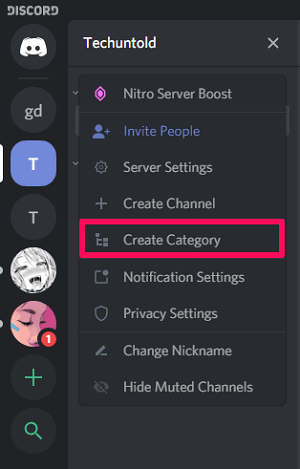
2. Now, click on the drop-down arrow beside the server name.
3. From the list of options, click on “Create Category.”
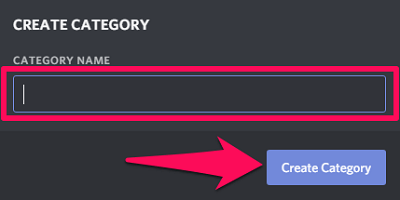
4. Finally, provide a name for the category and then click on “Create Category.”
Create Channel
If you want to create a Discord channel, then you should know that there are two types of channels i.e. Text and Voice channel. To create a channel falling into a particular category, follow the given steps.
1. Click on the server under which you want to create a new channel.
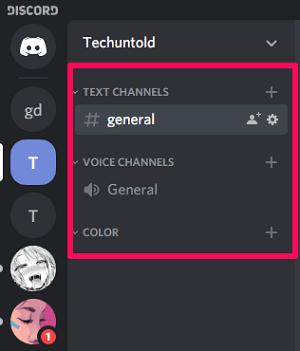
2. Now, you’ll see all the created categories including the “Text channels” and “Voice Channels” categories, which are automatically created as soon as you create a server.
3. In front of every category, there will be a + icon. Click on the + icon to create a channel under a particular category. For instance, to create a channel under the “Color” category (the category I created) I’ll click on the + icon in the front of that category.
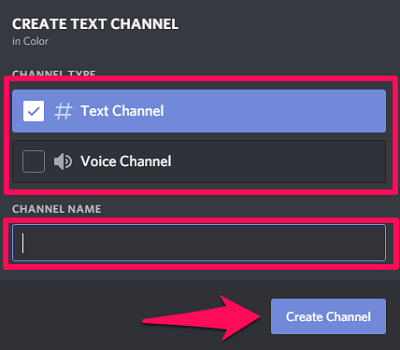
4. Now, select the type of channel which you want to create i.e. Text Channel or Voice Channel. After selecting the type, input the name of the new channel and click on “Create Channel.”
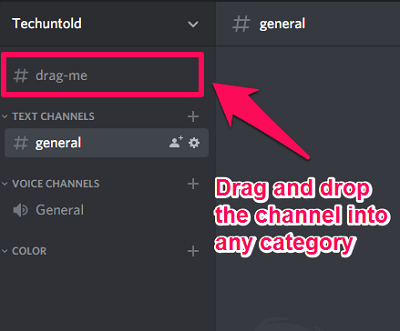
If you want to create a channel and not sure under which category you want that channel to be, then you can create a channel not falling under any category. Also, if you later decide a category for that channel, then you can simply drag that channel under that particular category. Just follow these simple steps to do so.
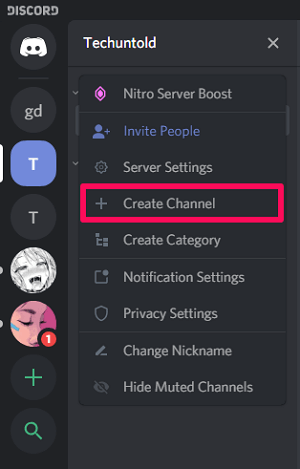
1. Click on the down arrow to open the menu of a server.
2. After that, click on “Create Channel.”
3. Now choose the channel type and click on “Create Channel” after giving it a name.
4. Now, as the channel is created, you can drag that channel under any category you want.
Note: You can’t drag and drop channels under categories from your Android or iOS smartphones.
Suggested Read: How To Change Discord Nickname From Mobile Or Desktop
Conclusion
Creating a discord server and inviting someone to it is really easy and it can be done within few minutes. However, the process can be a little bit difficult, especially for the people who are new to Discord. That is why we decided to provide you with a step by step process to do so. And we really hope that we were successful in our attempt to make the process easier for you.
