Do you know how to manage incoming notifications without putting your phone on Airplane mode? You might receive hundreds of notifications in a day and they can get a little overwhelming. That’s why Apple created the Do Not Disturb feature.
Do Not Disturb halts incoming notifications and allows you to focus on your tasks rather than your phone. Read on to learn how to use Do Not Disturb on iPhone.
Do Not Disturb On iPhone
Do Not Disturb on the iPhone is great at allowing you to manage which notifications you receive and when. You can activate it manually, schedule it, and even make exceptions for certain people and apps.
Manually Activate Do Not Disturb Mode On iPhone
One of the perks of the do not disturb mode on your iPhone is the fact that you can easily activate it via the Control Center. Here’s how it’s done:
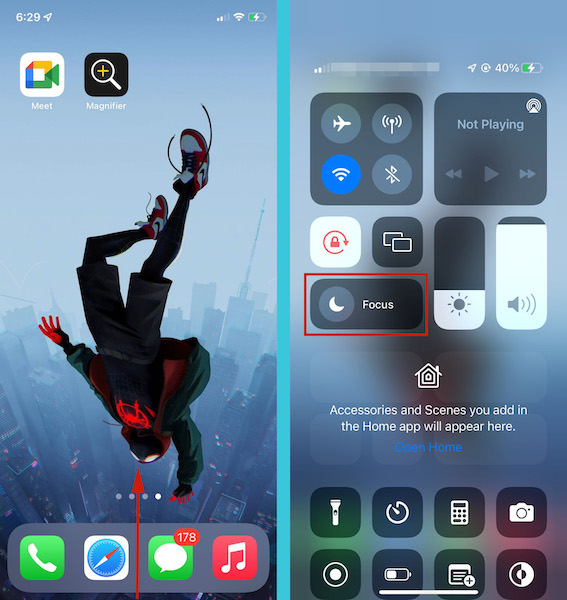
- Swipe up from the middle of your home screen to open Control Center. From there, hold down the crescent moon icon with Focus to access the Do Not Disturb feature.
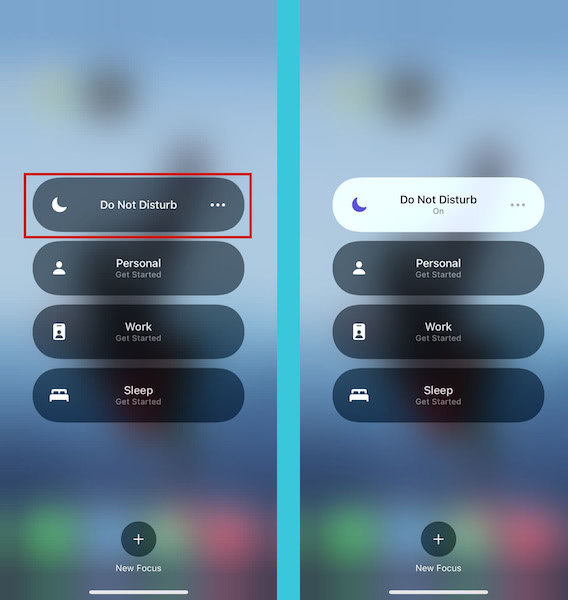
- After doing so, tap activate to turn on the Do Not Disturb mode. This will prevent you from receiving any notifications until you turn DND off.
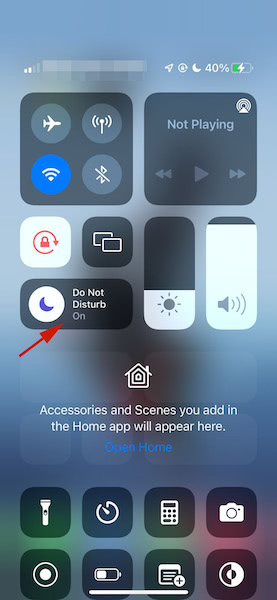
- You’ve successfully turned on Do Not Disturb on your iPhone. Return to the Control Center to see the crescent moon icon highlighted. Tap it again when you’re ready to turn off Do Not Disturb.
To see the steps in action, watch our video to see how to turn on Do Not Disturb manually via the Control Center:

How To Schedule Do Not Disturb Mode
Besides manually turning on the Do Not Disturb mode, you can also schedule it to activate at specific times. This can be when you’re at work, going to sleep, or doing your daily commute.
Scheduling your Do Not Disturb can save you time by halting incoming notifications and allowing you to focus on the task at hand.
Here’s how to schedule your Do Not Disturb on your iPhone:
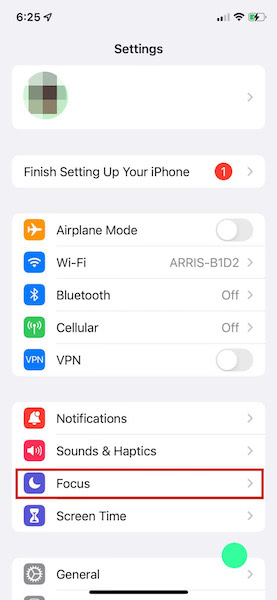
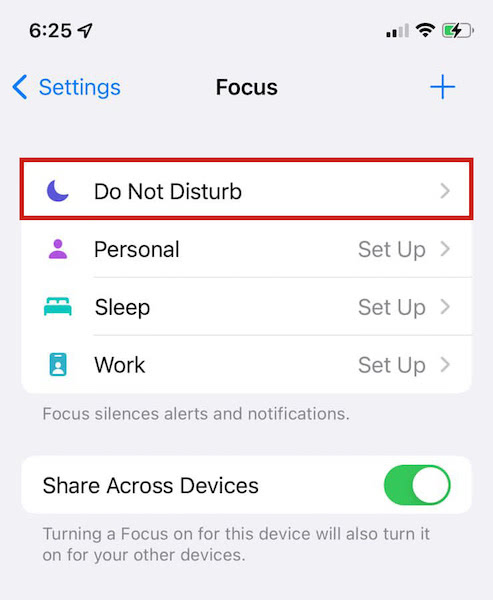
- Tap Settings to open the Settings app and then tap the Focus to access the Focus settings.
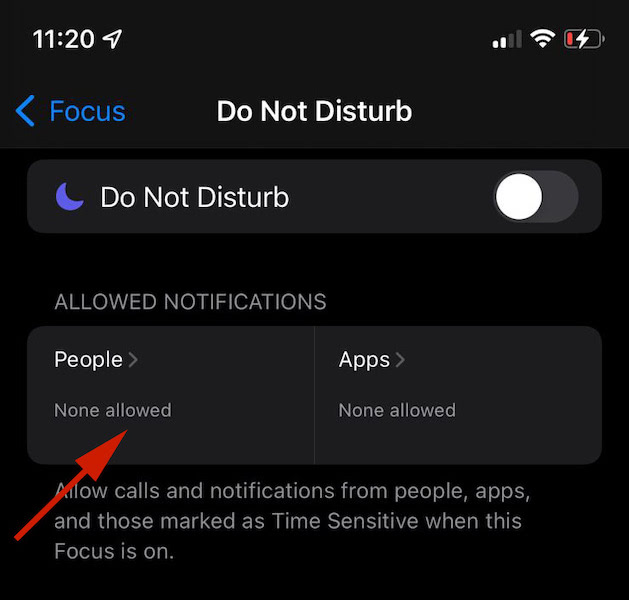
- Afterward, tap the Do Not Disturb option to access the Do Not Disturb settings.
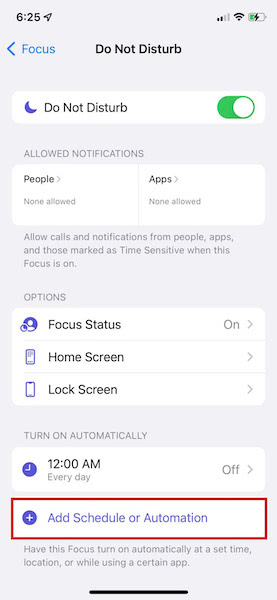
- On the Do Not Disturb page, tap Add Schedule or Automation.
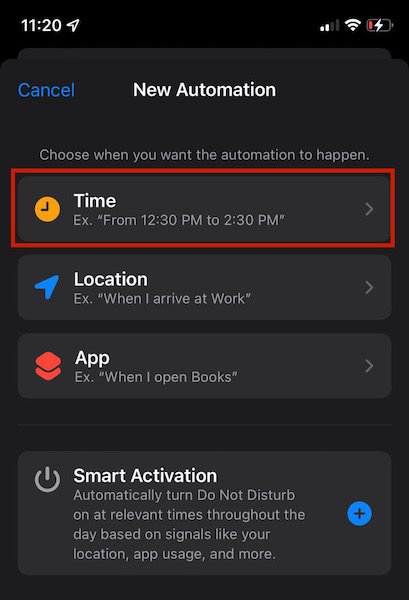
- Next, you’ll see three options to choose from, Time, Location, and App. These are the different conditions that Do Not Disturb mode will automatically activate. Time will be a time you set, Location will be a preset location, and the App is when you open a particular app. I chose the time option for this tutorial, so tap Time to continue.
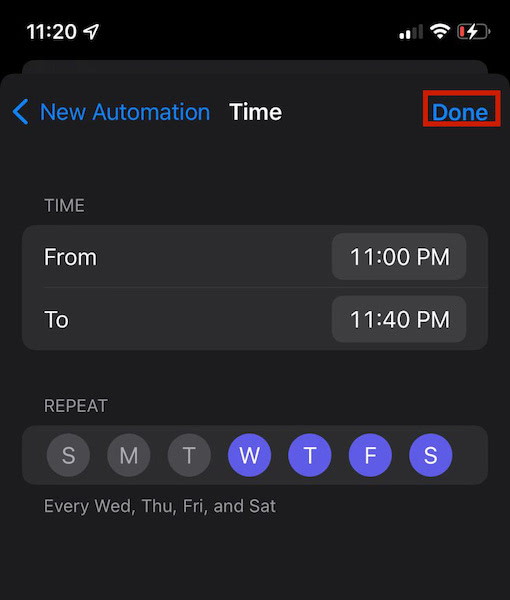
- Next, add the times and days that you want the Do Not Disturb mode to be automatically activated. For this example, I chose every Wednesday to Sunday from 11 pm to 11:40 pm, when you’re finished tap Done to complete the process.
Here’s a quick video showing you how to schedule Do Not Disturb on your iPhone:
Create Exceptions For Do Not Disturb On Apple iPhone
One of the features of the Do Not Disturb mode is that you can create exceptions. These exceptions can be allowing calls from certain contacts or notifications from specific apps.
Here’s how to allow calls from certain contacts when Do Not Disturb is active:
- In the Do Not Disturb settings menu, tap People under Allowed Notifications.
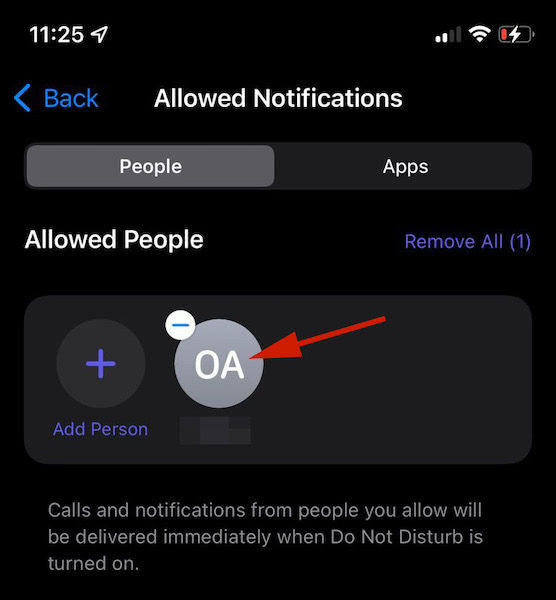
- Here you can allow calls from certain contacts or groups of contacts. Tap the plus icon to add a contact to the list.

- From your list of contacts, choose who you want to add to your Allowed list and tap Done. Now those selected contacts will be added.
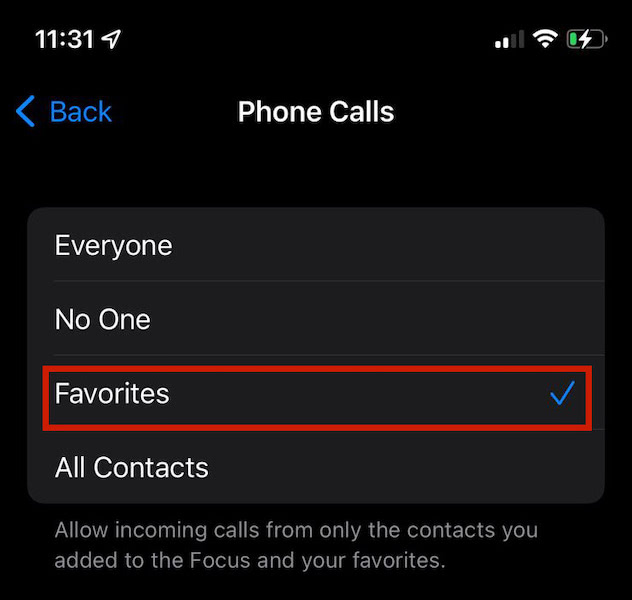
- After you’ve added a specific contact, you can add other people, tap the Calls From option.
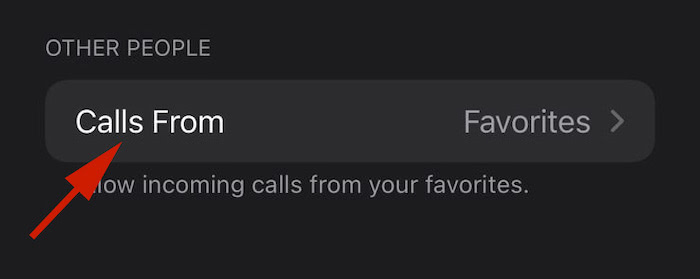
- You can choose to allow calls from “Everyone,” “No One,” or your “Favorites.” For this tutorial, I decided on favorites. Select the option you want to add to your list of Allowed Calls.
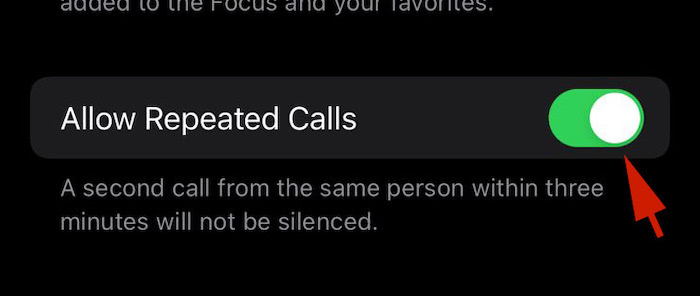
- Next, there’s an option titled Allow Repeated Calls, toggle it on if you want to allow the second call from the same person within 3 minutes to not be silenced. Once you’re finished, tap the Back arrow. You’ve successfully added exceptions to your Do Not Disturb list.
Here’s our video demonstrating how to allow exceptions on Do Not Disturb on your iPhone:
FAQs
What Happens When Your Phone Is On Do Not Disturb And Someone Calls You?
What happens when your phone is on Do Not Disturb and someone calls you, their call is sent straight to voicemail. Do Not Disturb blocks all of the notifications that you receive, including phone calls. When you use Do Not Disturb, you won’t see any incoming calls.
Can I Still Receive Calls On Do Not Disturb?
You can still receive calls on Do Not Disturb if you make exceptions for them. If you do not, then they’ll be sent straight to voicemail. However, if you receive repeated calls from the same number within a 3-minute window then the second one will not be silenced.
Do Not Disturb On iPhone – Wrapping Up
What’d you think of this article?
Do Not Disturb on the Apple iPhone is a great way to block your notifications and give you a break from the constant notifications. What’s even better is that you can automate the Do Not Disturb feature and allow it to automatically turn on at preset times.
While Do Not Disturb is excellent, sometimes the issue isn’t a notification but the person it’s from. In those instances, the best thing is to block that contact. If you don’t want to block a contact but your phone answers automatically then here’s how to turn off the Auto-Answer Call feature.
If you’re haunted by the high number of unattended notifications then you can disable the badge icon on your iPhone.
Overall, Do Not Disturb is a great way to ensure your time is spent wisely and that you’re not bombarded with notifications and interruptions. Leave any questions you have in the comments below and don’t forget to share this article with your friends, family, and followers.